Copyright © 2006 Balmoral Software (http://www.balmoralsoftware.com). Portions copyright © 2004 DreamCatcher International, Inc. All rights reserved. Republication, redistribution or conversion is expressly prohibited without the prior written consent of Balmoral Software.
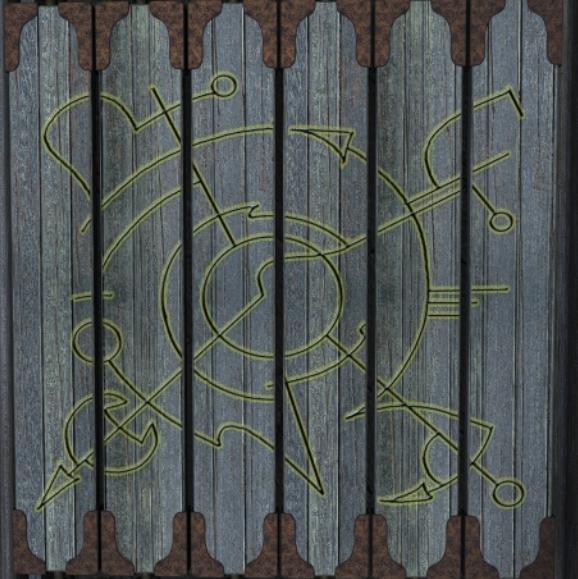
Graphics in Aura are extremely well-done, with lots of detailed texture-mapped rendering and creative use of light and shadow. Cyberpuppet figures are occasionally seen in the numerous cutscenes interspersed throughout the game. The sharpness of the game's graphics is high and the great variety of textures used everywhere adds to the feeling of immersion in whatever strange world you're exploring. Obviously the designers spent a great deal of time inventing the game's architecture, interior design and environmental details.
For the most part, the game's operational interface is effective. Right-clicking the mouse accesses the inventory, which contains a manageable number of items needed in the current environment. A close-up window shows details of each inventory item, which sometimes is necessary since items seem to be added to the inventory in no consistent order. Pressing the Escape key enters or exits the Main Menu, from which a few audio and video settings can be modified and saved games loaded or saved. The saved-game mechanism itself is way below par, considering the quality seen in other aspects of the game's design. There are no visual or player-named capabilities when saving a game -- only a timestamp made at the time the game was saved. As a result, a tedious additional procedure is necessary after saving a game to reload it to observe its timestamp, and then make an external record of it. The list of saved games is very slow to scroll through, so restoring an older game is a monotonous process. Games cannot be saved while zoomed in on a close-up scene.
Game installation requires nearly 2 GB of hard drive space, but this avoids all CD swapping during gameplay and so seems worth the extra installation time. The main game interface is a standard point-and-click design, and works effectively. No online help is available, but the game's booklet is well-written and comprehensive.
The enjoyable graphics of Aura are experienced through a 3D spherical navigation engine that provides an appropriate degree of sensitivity to mouse movement left and right as well as up and down. Movement transitions are occasionally provided with cutscenes, which seem a more effective use of resources than employing them at every frame in the game. Close-up views are static and make for convenient interaction with the environment. A smart cursor is highlighted when a present or future activity is possible, so tedious pixel-hunting is thankfully avoided. Most of the areas of gameplay to explore are relatively concentrated, so there is not too much backtracking. What little there is does not detract from gameplay and in fact allows for more enjoyment of the scenery.
The game plot is fairly thin since solution of puzzles is the main focus of the activity. However, this design works very well since intermediate goals are well-balanced throughout the story. There are consistent payoffs on solving puzzles in which new areas are opened up for exploration. So even without a great deal of detail in the backstory, there is an excitement engendered throughout gameplay and the integrated puzzles don't come across as irrelevant distractions. Also, much of the gameplay is non-linear so that puzzles can be solved in different orders. On occasion, certain puzzles must be solved before others, so there may be some experimentation or trial-and-error involved. The puzzles themselves are functionally well-designed and for the most part are logically accessible. Generally, their level of difficulty seemed just about right -- not so easy as to be tedious, but not so complicated as to be frustrating. Visual clues for some of the more difficult puzzles are provided in a journal in your inventory. However, this feature still leaves significant mental challenges for the player. Only a few puzzle clues clues are given in character dialog, and a subtitle feature makes this information easier to absorb. With one minor exception, there are no timed sequences in the game. Overall, the puzzles in Aura are very good compared to other point-and-click adventures.
Music in Aura isn't too bad, and some of the sequences in the Na-Tiexu world are quite enjoyable. At least one of the music segments is an obvious copy of a well-known popular song riff. The game's sound effects, although clearly meant to be atmospheric, are often simply inappropriate. Throughout the disparate worlds in the game, there are random, unsuited noises such as door-knocking, a snort/snarl/snore sound, a strange scraping sound, an urban police siren, the sound of a door closing, or a sudden blast of wind. These tend to distract from immersion in the gameplay.
Frequent game crashes and lockups were completely fixed by installing Patch 1.04. After installation of the patch, an indication appears on the Main Menu screen to confirm that it has been applied. However, even after the patch was installed, we experienced a bug in the game that prevented further progress without a manual edit of the saved-game file (described below). And at least one game resulted in a random glowing green fang appearing in the inventory, even though it had already been used to solve a previous puzzle. However, since we had found a workaround for the worst of these issues, our enjoyment of the game was not affected.
Enter the house and turn left. Zoom in on the bookstand and read the note from Grifit - you're on your own in this world, but he has given you some visual puzzle clues that you can find in your journal. Turn right and examine the set of three shelves next to the chair. Pick up a charger -- this becomes the first item in your inventory, which you can access by right-clicking the mouse. This charger is empty and needs to be reactivated.
Walk around the globe and approach the desk on the far side of the room, to the right of the fireplace. Open the decorative box at right to retrieve three gems, three stencils and a generator. Also pick up a lighter and a thermometer from in front of the balance scale on the desk. Turn around and move in on the left side of the other desk in the room, just to the right of the globe. Use the lighter to ignite the bottom of the boiler.
Move around to the other part of this desk and zoom in on the left-hand device to which the boiler is connected. Rotate the Y-shaped control twice, so that the cylinder is turning and the flexible tube at right is vibrating. Scan right twice to the device on the right side of the desk, and insert the charger. Scan left and place the thermometer on the right side of the rusty platform, just below the support post. Set the correct heat level on this device by sliding the horizontal lever to the right. Scan right and depress the trio of grey pipes at right to spin the zodiac wheel and recharge the charger. The correct heat level is set when the charger is sparking. This is the third setting from the left on the heat control device. Retrieve the charged-up charger.
Zoom in on the left side of the globe. Illuminate it by turning on the overhead light at upper left. Click on the top of the globe to rotate the planets, making note of how their colors change:
	Planet     Unlit color     Lit color

	Large      Blue            Red
	Medium     Red             Yellow
	Small      Yellow          Green
	Ringed     Green           Blue
Enter the side room of the house, containing a large spiral staircase. Turn around and access a pentagonal puzzle mounted on the wall. Press each of the five buttons once to disclose a projector-like device in the center of the room. Zoom in on top of the projector and insert the generator into it, which opens a door to an alcove off this room. Enter the alcove and pick up a lever from the floor.
Exit the house and turn right. Follow the path toward the tall and narrow rock in the distance. When you see a green area ahead, turn left and follow a lighted side path. This path crosses several footbridges before there is a structure at the right containing a bell. Go up the steps into this structure and click on each of the blue bowls to see a symbol displayed in a burst of energy. Each of these symbols is associated with a distinct shape on the post behind the blue bowl:
	Post symbol        Energy symbol

	Curve              Curved top
	Vee                Circular top
	Square bracket     Flat top
Continue up the path to the right and cross some more footbridges until you reach a circular clearing from which several stone steps radiate. Turn right and observe the structure at the top of a small grassy hill. Note the three prongs at the top of this structure.
Turn left and note that there are three cylindrical structures here, each with a pointed roof. From left to right, these roofs are colored blue, red and green, but they may be difficult to see since they are rather dark. Go up the steps to the blue structure and press the button in the red octopus-like device at left to open the door. Enter the door and repeatedly operate the device inside until you see a cutscene showing one of the prongs being electrified. When the prong is activated, make a note of the symbol displayed in the device. Repeat the process in the other two cylindrical structures and you will find the following associations (left to right):
	Color     Symbol

	Blue      Comma
	Red       V
	Green     J
After all three prongs are electrified, return to the clearing and zoom in on the hemispherical green light. Click the top of the prong above the light to raise it up, then retrieve the Zodiac Triangle just above the light.
Return along the path with the footbridges, then turn left and enter the green-lighted area you saw earlier. A central podium has four multi-colored posts each of which is facing a stone obelisk in the outer wall. From the entrance to this area, walk to the right around the outside path that encircles the central podium. Open the hemispherical cover in front of the first obelisk to disclose a three-pronged mechanism surmounted by three colors. Look at the very bottom of the obelisk to see that it is associated with the large planet seen on the globe in the house. Rotate the pronged mechanism until its front-facing color matches the unlit color of the large planet (blue). Continue around the outside path, setting the unlit colors for the other planets (ringed-green, medium-red, small-yellow).
Enter the central podium and rotate each post until the color associated with the corresponding lit planet is facing outwards towards the stone obelisk. Starting at the front right and moving counterclockwise, the outward-facing colors of the posts should be red, blue, yellow and green. When all obelisk and post colors have been correctly positioned, a cutscene plays and you receive a Navigational Map in your inventory.
Return to the front of the house, but just before reaching it, turn right to move towards a dark structure dimly seen amongst the rocks. Approach the Y-shaped path intersection and turn right to a structure containing a green hemisphere. Insert the lever from your inventory into the receptacle below the hemisphere. Operate the lever to activate the device and provide light to the dark building next to the waterfall behind you. Turn around and retrieve the lever from beneath the hemisphere, then turn around again and approach the lighted building next to the waterfall. Insert the lever into a similar receptacle and operate it to activate the compass-like device in front of you. Put the Zodiac Triangle into the compass and note that rotating it associates the twelve zodiac symbols in triplets.
Return to the house and enter the side room with the projector. Climb the stairs leading to the upper level. Partway up the stairs, turn left and look at a dial on the wall. The dial contains the same energy symbols seen in the bell house outside, and your journal indicates that the four-pronged gear at the bottom of the dial may be important. Since the slots in this gear are V-shaped, rotate the dial until the corresponding symbol (the one with the circular top) is aligned with the gear. Continue up the stairs and zoom in on the next dial. This one has semicircular teeth in the gear that should be aligned with the symbol having a top that curves down. A third dial can be found next to the end of the railing in this room and should be aligned so that the flat-topped symbol matches the square gear teeth. When the three dials are correctly set, a cutscene plays and the device in the center of the room is activated.
Insert the Navigational Map into the device. Look at the base of the device and insert the charged-up charger into the receptacle. Zoom in on the rings of zodiac symbols on the front of the device. These symbols need to be aligned according to the triplets identified by the Zodiac Triangle in the building next to the waterfall. The puzzle may be reset by zooming out. To solve it, press the right side of the top ring, then press the left side of the middle ring. At that point, the Navigational Map is activated by the device. Pick up the activated map.
Return downstairs and examine the projector in the center of the room. Insert the stencils and gems in the left-to-right order derived earlier from the cylindrical structures outside: Comma, V and J stencils above the three circles, blue, red and green gems in the circles. Click on the left side of the projector to operate it. Go into the alcove across from the projector and open the door to a tunnel. Enter the tunnel and watch a cutscene between Umang and Belik. Belik will add Sacred Rings to your inventory. Move forward to a flying machine and insert the activated Navigational Map into it. Push the lever to the right of the map to operate the flying machine.
Zoom in on the control panel. You won't have enough information to solve this puzzle yet, so return to the mooring tower and talk to the jigsaw puzzle guy again. Click on the doorknob to close the door and see a diagram, which is entered into your journal. Go back to to the bridge control panel and repeatedly rotate the four purple buttons until all four rectangles below them are green. Push the light-blue lever at the very bottom of the screen, then press the purple buttons in this order: / \ | --. This lights up a symbol in the right-hand screen above. Click on the symbol to move the rotating bridge to the right.
Follow the path around the mountain and past the top-level bridge on the left until you see a cable car ("tram"). Ride the tram over to the next mountaintop and follow the short path to Armagast's door. Go through the door and talk to Armagast. He will give you access to Dragast (opening some previously-locked doors) and your journal will now contain new puzzle clues for this area of the game.
Return to the central mountaintop via the tram (why are the flying-machine propellers still turning?). Make your way back to the top-level bridge leading to the red-domed building on another mountaintop. Cross the bridge and enter a chamber containing large statues. Move on into the room and look at the wall to the left of the central mechanism to observe a diagram. Zoom in on the central mechanism from the front side -- you will need to configure this mechanism to have the same diagram as on the wall. To reset the puzzle, just zoom away from it. Click on the circles as follows:
Press the southeast circle to turn it offIncidentally, the game had many lockups at this puzzle until patch 1.04 was installed. After the puzzle is solved, a cutscene shows a lever being operated. Go to the back of the puzzle and operate the lever to the left of the large statue to rotate it and expose a tunnel leading downwards. Go through the tunnel to a prison cell holding Arkampus.
Press the central circle twice
Press the northwest circle to turn it off
Press the central circle twice
Press the northeast circle to turn it off
Press the central circle once
Zoom in on a "shunting puzzle" similar to those seen in other games, such as the attic train puzzle in The 11th Hour. Label the puzzle positions as follows:
	A B C D  E  F G H I
	         J
A solution is:
	F E
	H I
	G H
	D J F G
	C D J F
	B C D J
	E D C B A
	F E D C
	G F E D
	H G F E
	J F G
	D J F
	C D J
	E D C B
	F E D C
	G F E D
	I H G F E
	J F G H
	D J F G
	C D J F
	E D
	B C
	A B
	Press button at top center
Arkampus shows you another diagram on the wall in the statue room and gives you an "Unknown amulet" (unused in this game). Return to the puzzle in the statue room and re-enter the same solution you used before. A cutscene shows the statue lever being operated again. Go to the back of the puzzle and operate the statue lever twice to tilt the statue back and provide access to another passageway above the statue.
Note: We experienced a bug in the game at this point. There were some saved games that provided no statue-lever hotspot even though the puzzle in the center of the room had been completely solved. The only way around the problem was to manually edit the saved-game file to provide the correct statue status information. To make this edit, exit the game and change the value of %Statua from 1 to 2 in the Saved\Storednnnn.str text file in the Aura installation folder. Then restore the game and change your position once to see the correct statue orientation and passageway access.
Go through the cave above the statue to a room with mirrors. Zoom in on the desk at left and take the puzzle pieces from underneath a book. Go to the opposite side of the room and pick up a mirror. Return via the cave, statue room and circular pathway down to the rotating bridge. Zoom in on the bridge control panel and repeatedly rotate the four purple buttons until all four rectangles below them are blue. Push the light-blue lever at the very bottom of the screen, then press the purple buttons in this order: -- / | \. This lights up a symbol in the middle screen above. Click on the symbol to restore the rotating bridge to the central position. Give the puzzle pieces to the guy in the mooring tower, and a diagram will be added to the last page of your journal. Return to the rotating bridge control panel and click on the right-side symbol.
Go back through the statue room and cave to the room in which you found the mirror, and climb the sunlit ladder at its far end. Place the mirror in the receptacle behind the cylindrical column of symbols.
Save your game at this point. Zoom in on the column and rotate the top two symbols until the mirror shows that they match what you have in your journal. Note: there are actually five symbols around each cylinder. To get the correct orientation from the initial puzzle state, press the upper symbol three times and the lower one twice. Zoom out to access the bottom three symbols in the column. Repeat the process for those symbols: the upper and middle symbols are okay as is, but you will need to press the lowest one four times. A cutscene plays, and eventually shows the statue lever being operated again.
Return to the statue room and operate the statue lever twice. If there is no hotspot for the lever, use the procedure above to change the value of %Statua from 2 to 3. Go through the gate beneath the statue to a ladder.
Save your game at this point. Note the symbols on the wall here, showing the juxtaposition of symbol pairs. Each symbol is faintly reminiscent of a letter or number. From left to right, they are:
T (upside-down) with WClimb the ladder and zoom in on the cylinder containing a column of four wheels of symbols; these are the same as those seen behind the ladder. From your journal, you can expect the solution of this puzzle to provide access across the sunken bridge ahead. There are four columns of symbol wheels in this puzzle, and each column is accessed by turning the wheel at the top of the cylinder. All symbol wheels except the top one on the first column can be turned -- this helps to keep track of the the orientation of the cylinder. Using the match-ups T-W, G-Y, 4-4 and L-L in both dimensions, the solution is:
Zig-zag or "L" shape with a similar one
G (on its side) with Y (notch only on its right arm)
Arrow or "4" shape with a similar one
	  T       G       4       L
	L   T   W 1 G   Y 0 4   4 2 L
	  L       W       Y       4

	  L       T       G       4
	4 3 L   L 0 T   W 2 G   Y 1 4
	  4       L       W       Y

	  4       L       T       G
	Y 1 4   4 3 L   L 2 T   W 0 G
	  Y       4       L       W

	  G       4       L       T
	W 0 G   Y 3 4   4 0 L   L 3 T
	  W       Y       4       L
Only the left side of the wheel at the top of the cylinder is used to move the columns to the right in the diagram above. The number in the center of each set of symbols shown above indicates how many times that wheel is rotated from the initial puzzle state. Move forward across the raised bridge to retrieve the Tetrahedron of Dragast.
Return to the rotating bridge between the mountains and zoom in on the control panel. Repeatedly rotate the four purple buttons until all four rectangles below them are red. Push the light-blue lever at the very bottom of the screen, then press the purple buttons in this order: -- \ / |. This lights up a symbol in the left-hand screen above. Click on the symbol to move the rotating bridge to the left position. Enter the building at the end of the walkway and continue walking forward to a point where a path branches off to the left.
Continue forward through a circular hatchway into a second room of the cave. At this point there is another branch to the left towards an elevator, but for now continue straight and up a ladder to what looks like the top of a large steam boiler, similar to one of the drawings in your journal. Move around to the right rear of the boiler and rotate the valve to charge up the boiler -- steam will be shown escaping from the top of the boiler. Move back to the front of the boiler, then move slightly left and operate the yellow-handled lever at the lower front of the boiler to reset it. Zoom in on the top of the boiler and operate the valve at its top.
Return to the right rear of the boiler and rotate the valve there again. This time, steam does not escape from the boiler, and the valve you just used is no longer a hotspot. Move around to the left rear of the boiler and operate the lever at the Y-junction of pipes to orient it along the pipe leading to the front left (not the rearmost pipe). According to your journal, this action should activate an elevator mechanism.
Go back down the ladder and take the right branch point to the elevator (do not pass through the circular hatchway). Enter the elevator and operate the large handle extending up from the floor. After the elevator descends, exit and move to the right. Rotate clockwise both pipe valves to the right and left of the large double tank against the wall of the cave. Face the half-buried generator mechanism at left and operate the handle at its front, which activates the waterwheel in the background. Move to the left of the waterwheel to observe a trio of machines in another cave chamber below. According to your journal, the rotating waterwheel should activate these machines.
Go back up in the elevator and exit this cave chamber through the circular hatchway. Move forward to the branch point illuminated by red lights. Take the side path to the right past some machinery and on quite a way deeper into the cave. Along the way, you'll pass a blacksmith's alcove at left; make a note of its location. After passing through a mineshaft you'll end up in another cave chamber.
This is the chamber previously seen from the waterwheel area above. Approach the trio of machines at left and operate the angled control lever next to one of the floor lights illuminating the machines. Another mine worker will appear and give you a broken battery. Give the broken battery to the blacksmith back in the mineshaft, then pick up a new one from his shelf. Return to the trio of machines in the cave chamber and place the battery into one of the slots in the leftmost machine. Operate the control lever to see that the lower half of each machine is rotated some fraction of a turn before the upper half descends onto it. For the batteries and slots to match up, the lower halves must be correctly set up and the amount of rotation must be predicted. For some more pointers on this puzzle from the pleasant mine worker, use the knocker on the door at the back of the cave chamber.
Move towards what looks like stacks of paint cans on a table. The yellow, light-blue and light-green colored cylinders along a diagonal from upper left to lower right indicate how much clockwise rotation is produced by the trio of machines (the other six cylinders are irrelevant). For example, a three-quarters red circle indicates that the associated machine will rotate three-quarters of a turn before the upper half descends to match up batteries with their slots. Make a note of how many red quarter-circles (if any) are shown for each machine.
Return to the trio of machines and rotate each battery so that it will line up with an overhead slot after the indicated clockwise rotation is applied. For example, if the yellow (left) cylinder was three-quarters red, you would first line up the battery in the leftmost machine with its overhead slot, then rotate the battery holder one more quarter turn. After the three quarter-turns indicated by the yellow indicator cylinder, the battery will properly line up with its overhead slot. Note that the color of the ring surrounding each machine's lower battery holder matches the color of the corresponding indicator cylinder. Note also that the indicator cylinders may be randomly reset every time the machine lever is used. Operate the lever again to successfully close all three machines, which activates another mechanism elsewhere in the cave.
Return through the mineshaft and cave to the other machinery area surrounded by suspended walkways. Face the structure in front of the V of cylinders that you just activated, then move forward onto the metal grate. Operate the short red-handled lever at lower left to raise the platform you're standing on. Turn right and move forward to a now-opened quartet of squares. The cage in back looks like one in your journal. Click in the center of the squares to disclose a handle, then turn the handle to activate the cage and open a large circular door previously seen at the end of the top-level bridge outside. Use the lever again to lower the platform. Leave the cave complex and return via the rotating bridge and tram to Armagast.
Go up the steps and give the tetrahedron to Armagast; he will tell you to activate the lift (elevator). Looking around the room, you can tell that the elevator is probably in the small alcove near the foot of the steps. Approach this alcove and note the symbols on its circular floor:
	      Fishhook
	||              J
	         O
Approach the eye-level machine at the opposite side of the room. Press the horizontal button until the array of symbols in the window matches what you saw on the floor of the alcove. Press buttons in each of the four columns until the metal extension symbolically matches the symbol in the window. The solution is
Bottom Second from top Second from bottom Second from bottomReturn to the alcove and zoom in on the control panel at its right. Set the control knobs at the same levels you found previously, activating the elevator. Take the elevator up to the first level, then turn around and click upwards to ascend to the second level. Place the tetrahedron into the receptacle. Take the elevator down to Armagast's level and talk to him again. He will show you the correct symbol sequence to enter at the first level:
The room entrance is at the bottom of this map, and the central symbol in each row of three should be oriented towards the back. This information is also recorded into your journal. Take the elevator to the first level.
Save your game at this point. Set the appropriate symbol sequence on each part of the three columns. The number of rotations to use is:
	        1
	        2
	        0

	0                  1
	2                  1
	2                  2

	      Entrance
A cutscene plays, in which the sphere is united with the tetrahedron. Go up to the second level and get the Sphere within the Tetrahedron. Leave Armagast and go via the tram to the opened large circular door at the end of the top-level bridge. Enter through the circular doorway and use the elevator lever to descend into the dungeon of Dragast.
Exit the elevator and proceed down the ladder to the end of the walkway. Place first the tetrahedron and then the Sacred Rings into the circular opening of the device, and it will create a Tetrahedron within the Rings in your inventory. Return via the elevator, circular walkway and the rotating bridge (middle symbol) to the mooring tower. Use the lever in the flying machine to travel to the next world.
Approach the table with four platforms; note the grey T-shaped structure at center. The onerous task here is to place colored tuning forks into their correct locations in the correspondingly-colored platforms. Tuning fork tones can be tested by clicking them on the short segment of the grey T-shaped structure visible at the edge of the screen when zoomed in. To accurately hear the tones, you may want to first turn down the Music and Environment portions of the game's Audio Settings. If you have any tuning forks in your inventory from previous attempts at this puzzle, exit and re-enter this room to return them to their initial positions loosely arrayed on the table.
Zoom in on the left pair of platforms on the table. Use compass headings to indicate the receptacle locations on each platform: N at the top and E at the right. In the leftmost (purple) platform, move the loose purple fork farthest from the purple platform into location E. Move the other loose purple fork into location S of the purple platform. Move the loose green fork farthest from the green platform into location N of the green platform. Move the left-hand loose green fork into location W of the green platform. Move the remaining loose green fork into location S of the green platform.
Zoom out, then zoom in on the right pair of platforms on the table. Move the loose red fork farthest from the red platform into location S of the red platform. Move the other loose red fork into location W of the red platform. Move the loose gold fork farthest from the gold platform into location W of the gold platform. Move the other loose gold fork into location E of the gold platform. Zoom out and press the button beneath the central T-shaped structure on the table, activating the four screens in this room.
Zoom back in on the left side of the table and press the button in front of the left (purple) platform. Zoom out and exit the room by the brown door opposite the one you entered from the flying machine. This sends you into the wintertime Astrology World.
Proceed forward along the path, up the tall ladder and into the house. Climb the stairs, then move left to speak with the wizard-like Astrologist (only from his right side). Exit the house, return down the ladder to the Branch Room and use the button in front of the green platform (second from left) to enter the Spirit World.
When you have all seven mood figures in your inventory (note that each one has a unique facial expression), return through the hole in the rock and speak again with the old woman in the settlement. Move to the right and take the Grail from the floor. Return to the path intersection and take the left path. Just past the intersection, look on the ground to the left of the path and pick up a leaf (this is easy to miss). Continue down the path all the way to the end where a statue with a Dilbert hairdo stands in front of a small pool. Put the grail onto this statue, then click on the pool below to observe a sequence of mood figures:
#1. Downturned oval mouthMost of these expressions are fairly different, except possibly for #3 and #5. Those two can be distinguished from each other by noting that #3 has more of an upturned expression. Some fairly obvious locations for these mood figures are the seven stone posts opposite from the grail statue (especially since each is a hotspot). Starting from a hill behind the pool, a vine connects these posts in sequence. Place the statues along the vine path in the order given in the pool:
#2. Downturned closed mouth
#3. Looking up with horizontal mouth, slight notch on left side
#4. Circular mouth
#5. Horizontal mouth, slight bump on center lip
#6. Frowning with downturned mouth
#7. Happy, upturned open mouth
	           Statue

	      #6            #2

	Algae #5            #4     #1

	      #3            #7

	            Path
When the mood figures are placed correctly, a cutscene plays. Take the Grail with Spirit from the grail statue.
Return to the old woman in the settlement and she will direct you to her young helper. Turn around, cross the bridge, climb the ladder and move to the far corner of the floor. Talk to the young woman and pick up a pot of flower manna from her shelf. Return to the path intersection and take the right-hand path through the hole in the rock and into the cave. Place the flower manna on the stone in the center of the cave.
Return to the girl and talk to her again, then pick up a vial of smoke from her shelf. Return to the cave and place the vial of smoke on the center stone. Click on the vial to release the smoke and open the flower inside the cave. Exit the cave and follow the path over the top of the cave. Click on the sapling to release some magic dust onto the tree stump and ripen the grains inside the cave. Re-enter the cave and pick up the Grain of Life lodged between the pair of rocks to the left of the central flat stone.
Return to the Branch Room and use the button in front of the purple (leftmost) platform to re-enter the Astrology World.
Turn around and face the lighted table to the right of the Astrologist's desk. Place the pot with plants on this table and the Grain of Life in the circular holder above (the dark grain will be difficult to see once placed in this location). Place the vial of liquid into the open receptacle at top right, then click on it to remove the shell from the Grain of Life. Retrieve the Grain of Life into your inventory.
Approach the multicolored mechanism next to the bookshelf on the other side of the room. Place the two dragon statues on the open platforms along the top, then put the Grain of Life into the circular center of the mechanism to charge it. Show the Charged Grain of Life to the Astrologist and he will give you access to the Planets puzzle upstairs.
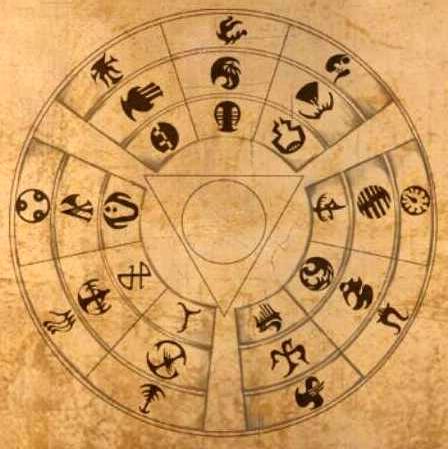
Climb the spiral staircase on the other side of the room. At the top of the stairs, turn right to observe a dial on the wall. This dial indicates one to four units associated with each symbol in the middle column written into your journal from the Astrologist's bookshelf:
	Connected circles     1 unit
	Triangle              3 units
	Asterisk              4 units
	Square                2 units
Turn around and exit through the door onto the balcony and face the Planets puzzle at left. Activate the puzzle by putting the charged Grain of Life into the vial of yellow liquid. The object of this puzzle is to place the symbol balls into the correct locations in the compass rose (North at top). Number the initial symbol ball locations clockwise as follows:
	4     5
	3     6
	2     7
	1     8
with the compass rose in the middle of these two columns. To find out where the balls should be placed, compare their symbols with the information in your journal and the units information from the staircase dial. For example, if two ball symbols are separated on a line in the journal by the triangle staircase dial symbol (associated with three units), then those balls must be separated on the compass rose by three units. Note that the symbols on the balls may appear to be rotated somewhat from the corresponding symbols shown in the journal. This analysis provides the following results:
Ball 6 and Ball 4 separated by 1 unitNote that the lower-left (1), upper-left (4) and upper-right (5) balls all have only one location in which they can be placed (Southwest, North and Northwest, respectively); go ahead and place these. The incomplete compass now looks as follows:
Ball 3 and Ball 1 separated by 3 units
Ball 5 and Ball 7 separated by 4 units
Ball 8 and Ball 2 separated by 2 units
	          4

	    5           .

	.                   .

	    1           .

	          .
Since Ball 6 and Ball 4 are separated by one unit and the Northwest position is already occupied, Ball 6 must be in the Northeast position. Since Ball 5 and Ball 7 are separated by four units (that is, on opposite sides of the compass from each other), Ball 7 must be in the Southeast position. Since Ball 3 and Ball 1 are separated by three units and the North position is already occupied, Ball 3 must be in the East position. That leaves Balls 2 and 8 in the West and South positions (or vice-versa). Only one of these two possibilities is accepted as the puzzle solution:
	          4

	    5           6

	2                   3

	    1           7

	          8
Press the center button of the compass rose to test the solution. Retrieve the Star Dust and return to the Branch Room. Use the button in front of the red (second from right) platform to enter the Magical World.
Go back into the cave and continue past the place of gnarly plants. When you reach a waterfall, grab some water in the leaf you're carrying. If you're missing the leaf, return to the Spirit World to obtain it. Exit the cave and continue along the path to the left until it ends at a large bent plant.
Use the leaf with water on the plant at the end of the path. The plant is rejuvenated and you can climb it to an upper area of the rocks. Move forward and release a dark flat stone to dam the stream and stop the waterfall in the cave.
Return to the cave and continue through the area previously blocked by the waterfall. Approach the clearing ahead; proceeding much further down the path beyond again results in assassination by Amazons, so you'll have to find a way of neutralizing them. The area at the entrance to the clearing contains a control panel, an array of drums, and a large gong with blue symbols on it. From the bottom of the control panel opposite the gong, retrieve four multi-colored Teleportation Crystals. Enter the teleporter and place each of the colored crystals into a receptacle in the corners. The teleporter is now activated and you can use it to avoid the Amazon assassins. This is the only timed sequence in the game, and the automatic game recovery feature at this point means that you can retry it until you succeed. Go back to the teleporter control panel, turn around and click on the large blue gong behind it. As soon as the Amazons appear, immediately press the control-panel hotspot to trap them in the teleporter.
Move forward through the teleporter along a path to a large glowing crystal. Zoom in on any side of the crystal and press any of the four disks arrayed in a column. Try to remenber the tinny sound that is produced. Return to the teleporter and press each of the sixteen colored drums to determine which of them produce the same sound heard in the crystal. The matching sounds are indicated by asterisks in the following table:
	Blue     Green     Yellow     Red

	 -         *         *         -
	 -         *         -         *
	 *         -         -         -
	 *         -         -         -
Go back to the crystal and mark only those disks on each side that correspond to the table above. The color of the current crystal side can be seen by looking down to the colored stone below. After the cutscene plays, you will obtain the "Symbol of the Magical World".
Move forward between the smooth plant-like structures and back to the T-intersection in the path. Turn left and return to the Branch Room. Use the button in front of the gold (rightmost) platform to enter the Cave.
Return to the cave through the door you entered, and turn left. Pick up a glowing pink fang from the light fixture at left. Continue down the cave path collecting other glowing fangs as you go: green, red and blue. Zoom in on the sparkling fountain ahead and place the glowing fangs in the color order shown on the child's drawing in the living quarters:
	       Yellow         Pink


	Blue                         Green


	                Red
When the fangs are correctly placed, a cutscene plays and a side tunnel in the cave is illuminated. Move forward three times into this tunnel and retrieve a teddy bear lying on the rocks. Return to the living quarters and place the teddy bear in the doll bed near the child's drawings. Leave and re-enter the living quarters. Talk to the little girl and she'll unlock the far door for you. Go through the far door into a new area of the cave.
Turn left at the T-intersection (the other way is inaccessible at present). Proceed through the cave passageway to an outside cliff area. Talk to the little boy and learn about a singing bird.
Return to the T-intersection in the cave and proceed forward into the previously-inaccessible area. Continue until your path is blocked by a river of glowing green lava. Turn left and zoom in on a bed of blue crystals. Place the Magical Pyramid in the stone pit in front of the bed of crystals. Pick up a blue crystal from lower left and also retrieve the pyramid.
Turn around and proceed to the far side of the lava pool. Dam the lava waterfall here by using the pyramid. This alters the lava flow and exposes a footbridge where your forward path was previously blocked by lava. Cross the footbridge and continue straight ahead deeper into the cave until you reach a crystal figure flanked by two spiral shells. Add the crystal from your inventory to the figure and pick up a magical branch from the plant below.
Return to the footbridge, but do not cross it. Turn left to approach the dammed lava pool at the opposite side from where you originally placed the pyramid. From this side of the footbridge, retrieve the pyramid to expose a stone platform beneath the purple tentacles behind you. Place the magical branch on this stone platform. Return to the lava pool and re-dam the flow with the pyramid so that the stone platform is again submerged and the branch is transformed. Undam the flow and retrieve Magical Dust from the stone platform. Dam the flow with the pyramid one more time to expose the footbridge.
Cross the footbridge and return to the children's area on the cliff. Sprinkle the Magical Dust on the purple flowers on the ground here. This is supposed to make the bird sing, but it is barely audible over the music and sound effects that sound like doors slamming. Continue to the end of the cliff and take the bell from its stone holder. Return through the cave and living quarters back into the Branch Room.
At this point, all sub-quests in Na-Tiexu have been completed and all four screens in the Branch Room have pulsating lights above them. If you don't see all screens active, be sure you have retrieved inventory from each of the Na-Tiexu worlds: Grail with Spirit (Spirit World), Star Dust (Astrology World), Symbol of the Magical World (Magical World) and Bell (The Cave).
	          Carpet


	 Grail               Symbol


	 Bell                Star Dust


	          Entrance
A Tetrahedron and Sphere are created. Go to the far side of the room where the red carpet is laid. Face the center of the room and take the tetrahedron above. Go up the red carpeted steps and place the Tetrahedron within the Rings onto the stand. The Assembled Rings are placed into your inventory.
Go back through the Branch Room and operate the flying machine. Enjoy the cutscene with realistic ocean waves.
Copyright © 2006 Balmoral Software (http://www.balmoralsoftware.com). Portions copyright © 2004 DreamCatcher International, Inc. All rights reserved. Republication, redistribution or conversion is expressly prohibited without the prior written consent of Balmoral Software.