The Journeyman Project 2: Buried in Time
The Journeyman Project 2: Buried in Time
23 July 1995
Revised 21 November 2023
Copyright © 1995, 2023 Balmoral Software (http://www.balmoralsoftware.com).
Portions copyright © 1995 Presto Studios Inc. All rights reserved.
- This walkthrough provides a minimum path through the game. Clicking on more
of the written materials in the game will increase the final score. If your
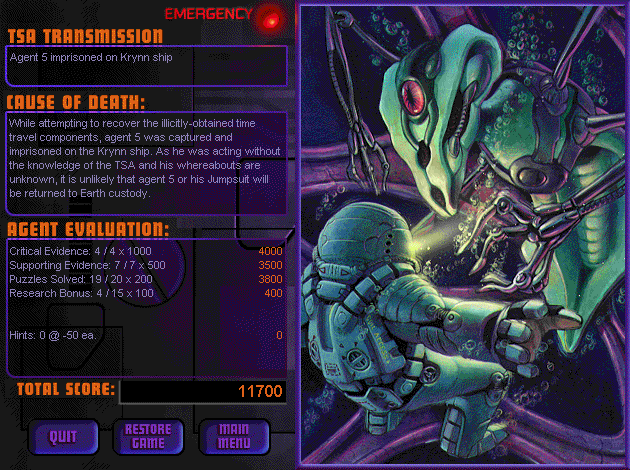
character dies before completing the game, your score components are displayed,
but otherwise your score is unavailable until the end of the game.
- Note that restoring a saved game will reset the alphabetical inventory list
to the beginning, which can be a consideration when preparing for a timed
sequence.
- There is no way to skip through dialog or video segments.
- There are occasionally mouse trails (multiple images) when dragging an
inventory item into the viewport.
- One bug was encountered late in the game, but it did not detract from
completing the game.
- Movement abbreviations:
- L: Turn left
- R: Turn right
- F: Move forward
- U: Look up
- D: Look down
- Fn for n repetitions
New Game
Unskippable intro video plays
Access the Environ system:
L2 F R D F R F2 R D
Click on seat
Zoom in on Environ system
Press All-Sat button at right
Select "Symbiotry Technology Discussions"
Wait through ad to get Translate Biochip code: 689-22-378
Click when finished reading | Return
Select "Louvre Auction Raises 138.5 Billion"
Wait through ad to get Cheese Girl code: 625-94-978
Click when finished reading | Return | Return icon
F L F2 L F L F2 L
Zoom in on central shelf figure and click on it to enable the Jump Biochip
Zoom out | R F3 L F L F
Press dark Power button at lower left | Menu | Shopnet
Enter 689 22 378 (keyboard can be used for input) | Transmit | Accept
Purchase
Menu | Post Box | Translate BioChip | Replicate
Drag Biochip - Translate item off the viewport, and it appears in the inventory
list
U
Press dark Power button at lower left | Menu | Shopnet
Enter 625 94 978 | Transmit | Accept Purchase
Menu | Post Box | Cheese Girl | Replicate
Drag Cheese Girl off the viewport
Select Biochip - Jump in the inventory list
Click on J icon at left
Jump Menu at right
Select Farnstein Lab | Mission Briefing | Return | Jump
Requires Cheese Girl from BH
Drag the Cheese Girl icon from the inventory list to the right portion of the
viewport
At Hydroponics hatch, L D F5
Open Capacitance Array hatch
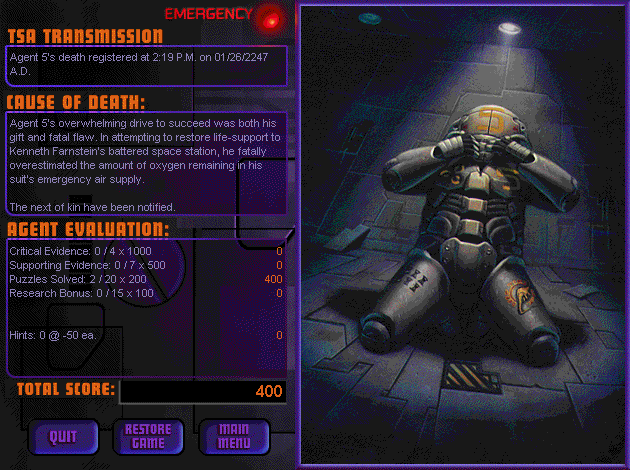
If you are in an unpressurized portion of the space station, you'll have a
limited time for exploration before your suit runs out
of oxygen (but you can always Jump)
F L2
Take Metal Bar from Habitat Wing hatch
R2 D F R U F
Zoom in on Environmental Controls panel
Click twice on blue circle at upper right (Capacitance Array) to Pressurize
Zoom out | R U F
Open Docking Bay hatch
F R F to see RAX ION at far left
R F to see DICOM and MAGELLAN CORPORATION
L F to see POP LOC
R3 F R2 to see center "tiremark"
F to see DOCKING CONTROL/SCIENCE WING
L F to see small yellow/black floor rectangles
R F
Open Scanner Room hatch
F through hatch
F when orange navigation arrow at right lights up
Click Yes to intrusive scan
Click Yes to Biochip download
L2 U and zoom in on manual override panel
Enter code spoken by Arthur: 32770
Click on red handle
Click on green hatch
The purpose of the Nexus puzzle is to exchange the red and green lights
Identify the locations as:
1
2
3
4
5
6
7
The solution is: 3 5 6 4 2 1 3 5 7 6 4 2 3 5 4
There's no exit from this location, so you'll have to find another way
Jump Biochip | Recall
F4 L F L F
Follow the steps here to replenish the Cheese Girl and
return to the Farnstein Lab
Put Cheese Girl on right portion of viewport
From Hydroponics hatch, R D F
Open Atmosphere Mining hatch (Arthur provides an audio override code)
An Explosive Charge is automatically added to your inventory
F and click green (Engaged) light
R2 D and open hatch
F and press up button on lift
R and zoom in on reddish object
Click on left vertical text: Run Mining Cycle
D L and zoom in again
Click on right vertical text: Run O2 Extraction
Zoom out | L
Press up button on lift
R2 F
Press dim green (Engaged) button
R2 D and open hatch
F2 L U and zoom in on the black rectangular panel
Click twice on leftmost orange circle (Biomass Processing) to Pressurize
Zoom out | D R2 D
Open Biomass Processing hatch
F3 L D and zoom in on the small panel at left
Set frequency on black dial to 11 khz
Press green bar for Positive Response
Zoom out | U
Click on green sphere to record the "electronic schematics" evidence
Mission complete
L F D F and open hatch
L F and open Atmosphere Mining hatch
F D R
Take the Water Canister (empty), which wasn't here when you visited this
location earlier
L U
Click dim green (Engaged) button
R2 D and open hatch
F
Press down button on lift
R3 and zoom in
Attach water canister to blue spigot
Turn circular yellow valve
Take Water Canister (full)
Zoom out
Use the Jump Biochip to travel to Chichen Itza (after a mission briefing)
Requires Translate Biochip from BH
Save your game at this point
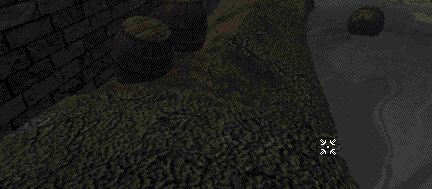
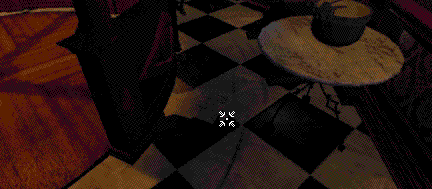
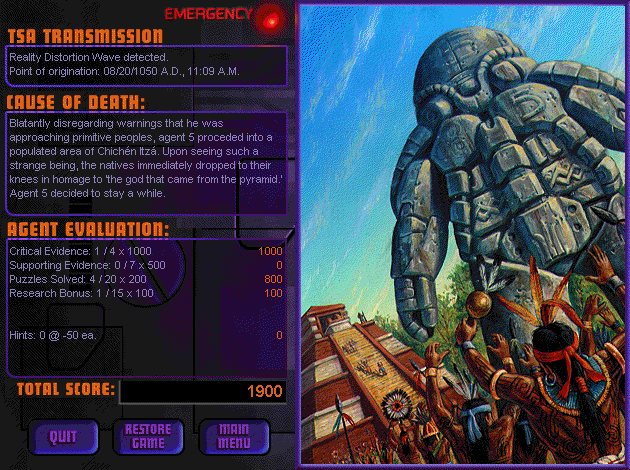
You'll arrive at the top of a Mayan temple -- if you try to descend the steps,
you'll die
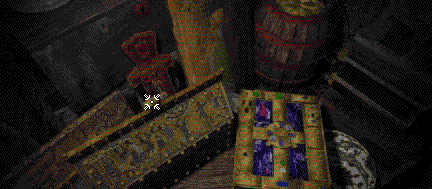
Enter the temple and note a Mayan calendar on the far wall. Look up at the
ceiling panels and use the Translate Biochip to read the ancient symbols.
You'll learn that a Holy Vessel contains the Breath of Izamna, and that the
Choc Nool statue out front grants access to the Underworld only on certain
days. Nine possible days are shown on another panel, and each of these can
be tested on the Mayan calendar by rotating the small and large dials.
From the starting location after the Jump, follow this streamlined procedure to
enter the cavern below:
R F L F and zoom in on calendar
Click up arrow once on smaller circle to set calendar to 3 Tree (God of
Fire)
Zoom out | L D
Take Ceramic Bowl
U L F D
Put Ceramic Bowl on Choc Nool statue
D
Take Skull from skeleton
U F D
Take Copper Medallion next to second skeleton
Jump to Chateau Gaillard (selecting Mission Briefing first)
Requires Copper Medallion from CI
F D
Take Bloody Arrow from dead guard
U R2 F4 D F L U F R to exit tower one floor down
Open door
F R F2 L F R D
Take Grappling Hook from garderobe
U R F R F2 R F4 L
Wait for an explosion
F D R F R F
Open the door to the smithy
F D R
Take Hammer
U R2 F R F R F D
Click on the brick at right to disclose a key mold
Put Copper Medallion into pan
Click the end of the horizontal wooden lever to melt the copper
Click on the pan, then take Copper Key
U R2 F L F L F R and open door
F R F3 R F L D
Activate the Evidence Biochip | Locate
Click on the "inappropriate footprint" evidence hotspot at lower right:
R F U to swim through the moat
Use the Grappling Hook on the central tower window
After the guards throw a boulder, you have about 9 seconds to move F to climb
the rope, or else you'll suffer the ignominious "Monty Python"
death
Quickly ACTIVATE the Cloak function
If you fail to hide from the guards, there'll be another
death scene
There may not be enough time to save your game immediately after climbing the
rope
After the guards leave, deactivate the Cloak function
F2 L F
Press the hatch release at the right side of the tapestry
If desired, visit the study one floor down to read a Burned Letter that was in
the fireplace and Roger de Lascz's journal, but these activities are not
required to advance the gameplay and there is some
danger in wandering around
From the tapestry, R2 F L F2 L D F2 U L F and open the storeroom door
Evidence of a "second time traveler" is recorded
F L F L D
Use the Copper Key to open the chest
Move F R3 F R D through the chest and into the cellar
Use the Evidence Biochip to locate the "perfection of a diamond's cut" evidence
on Richard I's sword:
Mission complete
U R F D R
Open metal chest and take Gold Coins
Jump to Da Vinci Studio (selecting Mission Briefing first)
Requires Hammer from CG
F R F D L2
Record another "inappropriate footprint" evidence on the studio floor:
U F2 D
Click on the door to get the Balcony Key added to your inventory
U and open door
F to record the "human presence" evidence from the balcony
R2 and open door
F
Avoid moving F again, which is fatal
Instead, move R F L F
To activate the elevator, move the left lever down, then move the right lever
up
D and turn wheel
U L2 F R F R2 F D R
Push the right elevator arm to descend
U R and open the door
F2 R F2 R D
Take the Coil of Rope
U L F2 L F and open door
F2 R F R F L F R F R
Take the Drive Assembly
R F L F R F4 R
Take the Wheel Assembly
If desired, look at the assembly diagram:
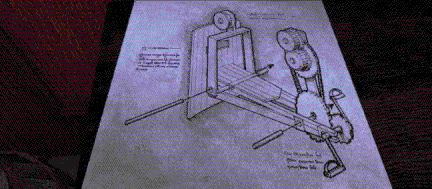
D L
Take the Wooden Pegs
L
Put the Wheel Assembly on the right side of the center framework
Put the Drive Assembly on the left side of the center framework
Drag the Wooden Pegs from left to right and place them where the icon
changes
When its handle is pointing to the lower right, use the Hammer on the exposed
wooden peg
Take the Siege cycle
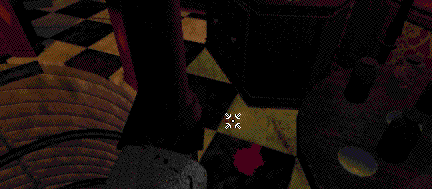
U L F2 L F2
If desired, look down at another diagram:

L F R F L F and open the door
F
R F L F R2 F2 L F L F R2 D
Use the cross-shaped knob underneath to turn the crossbow to face the tower
U L F
If you've moved the crossbow previously, move it to its home position by
rotating the left knob L as far as possible, and rotating the right knob D as
far as possible
Move the left knob R9 and the right knob D2 to center the tower window in the
crossbow's aiming sight
Fire the crossbow using its center vertical lever
L F L
Put the Siege Cycle on the ropes at upper left
F4 L D
Unlock the tower door with the Balcony Key
U and open door
F D R
Record the "electronic device" evidence on the studio floor:
Take the Lens Filter
Click on the Lens Filter icon to have it attached to your Jumpsuit camera
U F R D
Zoom in on the book on the table to record the "mathematical formulae"
evidence
Mission complete
Zoom out | U R F R F2 L
Open the cabinet and take the Preserved Heart
Jump back to Chichen Itza
Requires Translate Biochip from BH
Requires Water Canister (full) from FL
Requires Bloody Arrow & Gold Coins from CG
Requires Coil of Rope & Preserved Heart from DVS
Follow the steps here to re-enter the cavern
If you haven't retrieved the Skull from Cavern, look down and take it from the
skeleton
F5
R F
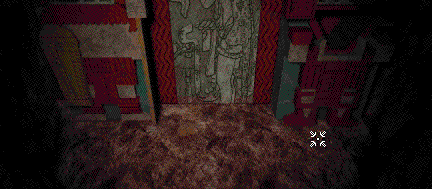
God of War
You can zoom in on a couple of the facade areas and use the Translate Biochip to
identify it as the temple of the God of War
Save your game at this point
Zoom in on the lower-right area and put the Bloody Arrow on the central
platform
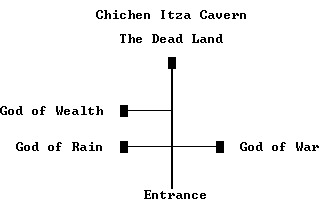
Move F through an open stone door into what is arguably the most complex puzzle
in the game. If you leave the temple through the door you came in, you'll be
unable to re-enter it without restoring a saved game. The "Donald Trump"
noises here are from two sets of dangerous mechanical spears that you must
pass in order to avoid dying. In this entry room,
there are two similar red dragons which control the operation of spears and
doors in the temple. Since the door back to the cavern and the one ahead are
both closed and have the same carvings, it can be easy to lose your bearings
as you turn around. However, all the dragon heads in the temple point
slightly to one side, facing deeper into the temple, and we have noted the
pointing directions (L or R) in the diagram below. The diagram indicates
which door or spear set is controlled by which dragon. If a dragon's mouth
is blocked open by a skull, the corresponding spear set or door is configured
to allow passage, and the problem reduces to one of skull management.

R D
Take Skull from Entry
U
Click on Dragon L1 to open its mouth, then quickly insert Skull from Entry into
it to stop the first set of spears
The noises get fainter at this point
L2
Click on Dragon R1 to open its mouth, then quickly move R F into the first spear
room
You can't save your game at this point without immediately dying on restore
F
L to the midpoint
Put Skull from Cavern into Dragon R2 to stop the second set of spears
R F L
Take Skull from Spear Room above the skeleton
L F R back to the midpoint
Remove Skull from Cavern from Dragon R2 and the spears restart
R2
Put Skull from Cavern into Dragon L2 to open the Entry door
R F2 R back to the Entry
Put Skull from Spear Room into Dragon R1 to open the door deeper into the
temple
R F2 R to the midpoint
Move Skull from Cavern from Dragon L2 to Dragon R2 to stop the second set of
spears
All doors should now be accessible
R F3 D
Take Obsidian Block
U L2 F5 and open the door
F4
God of Rain
You can zoom in on a couple of the facade areas and use the Translate Biochip to
identify it as the temple of the God of Rain
Zoom in on the lower-right area and put the Water Canister (full) on the central
platform
F5 R2 F R2
The bridge starts to swing dangerously in separate sections
To move to the next bridge section and avoid dying,
move F at the center of the swing
The final stone ledge is reached at the end of the right-hand upswing of the
last bridge section
F2 D
Take Limestone Block
Jump to CI to avoid recrossing the swinging bridge
Follow the steps here to re-enter the cavern
F6 L F
God of Wealth
You can zoom in on a couple of the facade areas and use the Translate Biochip to
identify it as the temple of the God of Wealth, along with some clues about
how you should behave
Zoom in on the lower-right area and put the Gold Coins on the central
platform
F3 D R
Use the Coil of Rope on the small U-bracket in front of the stylized dragon
F3 D
Take Jade Block
U R2 F2 R U F3 and open the door
F2 L F
The Dead Land
You can zoom in on a couple of the facade areas and use the Translate Biochip to
identify it as The Dead Land
D
Record the "replicated glass" evidence:
U
Zoom in on the lower-right area and put the Jade, Limestone & Obsidian blocks
into the triangular receptacle
F4 D
Record the "synthetic blood" evidence:
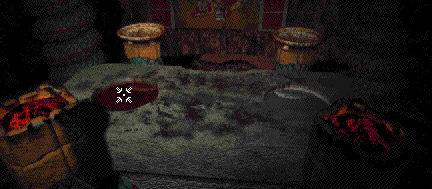
Put the Preserved Heart into the pool of blood at left
Click on the Mayan puzzle box
If you try to open the box without the correct combination, you'll
die
Use the Translate Biochip to set the puzzle to read "The Breath Of Itzamna", or
make the following movements starting from the initial puzzle arrangement:
Up 3 Down 2 Up 2 Up 4
Click on the curvy handle at right
Mission complete
The "electronic device" evidence is recorded
Take the Environ Cartridge
Use the Jump Biochip to Recall to BH
Follow the steps here to access the Environ system
Select the Lens Filter in inventory and click on its image to verify it's
attached to your Jumpsuit
Put the Environ Cartridge into the Environ system to view an unskippable video
segment from Michelle Visard (Agent 3 of the TSA). After about 9 minutes,
you'll be prompted by Arthur to enter her password, and will have about 90
seconds to enter it before you expire. From the
personal interest listed first in Michelle's profile in the Files Biochip,
the password is GRAVBALL.
R2 F2 D
Take Generator Core
U R2 F D
Zoom in at left
Press the red button at lower center and remove the Burned-Out Core
Replace it with the Generator Core, which turns on the lights
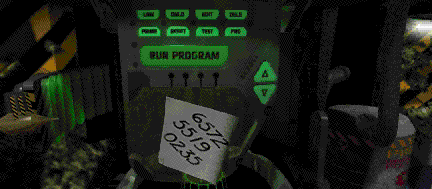
U L2 F2 R F
Click on the Plasma Tools device
Click twice on the green up triangle to show Transport Code
Run Program
Here's a screenshot since there's little time to jot down the code before it
dissolves:
R
Zoom in on the black screen to access the Interactive News Network
Select Symbiotry Technology Discussions
Click to skip the ad
Click NEXT to skip the Ambassador Icarus story
Click NEXT to skip the S.P.B. story
Click NEXT to skip the Ministry story
Select Appeal for Dismantling
Click right-arrow icon
Click on the red Krynn hotspot
Click NEXT 3 times
Note that the Krynn Transport Prefix is 272
Press the Return button or icon 4 times
R F L F R2
Click twice on the circle of the Matter Transmitter
Destination address code: 6572-5519-0235
Alien prefix: 272
F
Requires Explosive Charge from FL
F2 L F R F
Bug alert: If you move L F at this point, the game will hang
R
Cloak Biochip | Activate
Aliens pass by
Deactivate
Click on pad at bottom of tunnel
Click on pad at bottom of tunnel
F R F L
Click twice on the upper-right ovoid
Use the Explosive Charge to release the sword
Take Richard I's sword & zoom out
R F L
Click on the ovoid
Use Richard I's sword to release the object
Take the Interactive Sculpture
R F L
Click twice on the upper-left ovoid
Use Richard I's sword to release the object
Take the Codex Atlanticus & zoom out
Click twice on the lower-right ovoid
Use Richard I's sword to release the object
Take the Mayan Puzzle Box & zoom out
R F L
Click on the ovoid
Use Richard I's sword to release the object
Take the Environ Cartridge
R2 F
Click on pad at right side of tunnel
Select Richard I's sword in the inventory list
Click on pad at bottom of tunnel
Quickly use Richard I's sword on pad at bottom of tunnel, lest you
die
L F L
Select Burned-Out Core in the inventory list
F
Wait a little less than 2 minutes for Icarus to put you in the transporter
Quickly put Burned-Out Core onto the viewport (force field)
F
Quickly press purple button to the right of Icarus
R F to the central transporter booth
R2
If you haven't already done so, you can increase your score by selecting the
Files Biochip and reading the topics
Press purple button at left
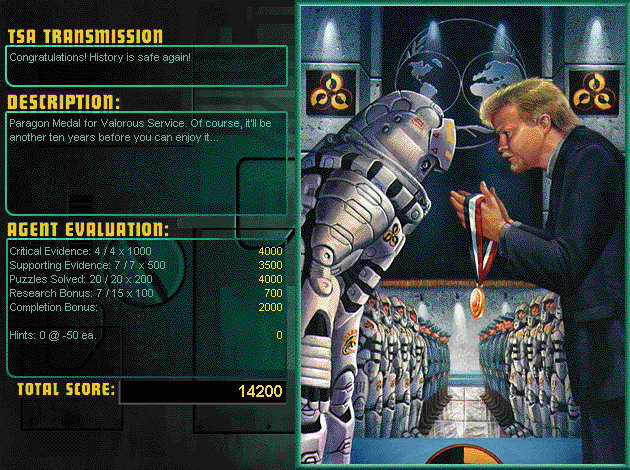
Click on the Congratulations screen and watch the endgame video, in which your
mind is wiped anyway
Shortest-route score (some research skipped):
Balcony Key
Biochip (AI) - Arthur
Biochip - Blank
Biochip - Cloak
Biochip - Evidence
Biochip - Files
Biochip - Interface
Biochip - Jump
Biochip - Translate
Bloody Arrow
Burned Letter *
Burned-Out Core
Ceramic Bowl
Cheese Girl
Codex Atlanticus
Coil of Rope
Copper Key
Copper Medallion
Drive Assembly
Environ Cartridge
Explosive Charge
Generator Core
Geno Andrews Single *
Gold Coins
Grappling Hook
Hammer
Interactive Sculpture
Jade Block
Lens Filter
Limestone Block
Mayan Puzzle Box
Metal Bar *
Obsidian Block
Preserved Heart
Remote Control *
Richard I's sword
Skull from Entry
Skull from Cavern
Skull from Spear Room
Water Canister (full)
Wheel Assembly
Wooden Pegs
*: unused
Critical Evidence 4/4 x 1000		 4000
Supporting Evidence 7/7 x 500		 3500
Puzzles Solved 20/20 x 200		 4000
Research Bonus 15/15 x 100		 1500
Completion Bonus			 2000
Hints 0 @ -50 ea.			    0

Total					15000
Table of Contents
Home
Copyright © 1995, 2023 Balmoral Software (http://www.balmoralsoftware.com).
Portions copyright © 1995 Presto Studios Inc. All rights reserved.