Copyright © 2017 Balmoral Software (http://www.balmoralsoftware.com). Portions copyright © 2006 Animation Arts Creative GmbH & Fusionsphere Systems Ltd. All rights reserved. Republication, redistribution or conversion is expressly prohibited without the prior written consent of Balmoral Software.
Secret Files - Tunguska is the first in a series of three games from distributor Deep Silver using an excellent game interface from Animation Arts. In this interface, the spacebar can be used to highlight all hotspots in the current game panel, and the mouse icon shows in green which mouse buttons can be pressed. Left-clicking initiates active verbs, such as Use, Take, Open, Put, Move, Give, Talk to, Select, Enter, Exit and Combine (in the inventory bar). Right-clicking executes passive verbs such as Examine or Read, and can be used to skip video sequences and dialog. Unfortunately there's no way to speed up character movement except when using the double-click option to exit a scene (this was improved in the game sequels). The top center of the screen is usually a safe place to position the cursor when right-clicking to skip dialog sequences. If you have the subtitles turned on, dialog from different characters is shown in different colors, and when a character is thinking rather than talking, the text is shown in italics. When an inventory item is added, consumed or changed, an icon appears briefly at upper left as a reminder. Most of the puzzles in the game are inventory-based. A few chapters are terminated with standalone puzzles, but these are easy and also have optional hints within the game.
As a general rule, be sure not to miss any hotspots, especially along the edges of the screen, or in areas without a lot of contrast with the "pulsing magnifying glass" icon. Also be sure to walk to the edges of each screen to scroll sideways in case the scene is wider than what's initially displayed. If you get stuck, try combining new inventory items with existing inventory items and using them on all hotspots. Also, right-click items in the inventory list to see if their descriptions have changed. Occasionally, you may need to move a character out of the way in order to interact with a hotspot in the scene.
This walkthrough provides a minimum path through the game; other gameplay sequences and dialog choices can provide additional backstory elements.
Take Porcelain bowl from table
Take Piece of rock from table
Use Phone to call Berlin police
Take Flask from top of machine at far right
Combine Piece of rock & Flask
Exit to hallway
Examine Nameplate at left to identify Max Gruber's office
Exit right to the museum exhibit hall
Examine List of personnel on wall at left to find out that Max Gruber is in office 4
Enter the rear area between the Tyrannosaurus and the Triceratops
Examine Statue, then open Secret door
Take Key from inside the statue
Exit
Exit by Stairs at left
Use Key on Fuse box
Use Fuse box to turn down the music
Enter office at left
Exhaust all three dialog choices with Max
Go back to Vladimir Kalenkov's office
Exhaust all three dialog choices with Detective Kanski
After an automatic exit from the museum, take Yellow glass shards at right
Use Key ring on Motorcycle seat
Use Motorcycle seat to get Cell phone and Sunglasses
Combine Yellow shard & Sunglasses to make Green shard
Use Motorcycle
Exit Vladimir's apartment to courtyard
Examine Garbage bin to get Rubber glove and bicycle Spoke
Re-enter apartment
Lift up Carpet edge
Use Spoke on floor Gap to get Cassette
Examine Desk at left
Put Cassette into Cassette tape recorder at upper left
Operate Cassette tape recorder to disclose the riddle:
The first and last on the car, a fourth of the openings in the entrance to the underworld, and finally, the guardians of my work.Back out and exit to courtyard
Take Handle from Bucket under downspout
Use Bike to get Air pump
Note that the car license plate number is B WK 283
Note that the sewer grate has 16 holes
Examine the Crate in the garage to get Double-sided tape and Glue
Combine Cell phone & Double-sided tape
Re-enter apartment and examine Desk
Use computer Keyboard
Enter code 2 3 4 2:
2: First number on car license plateExamine Monitor to read email from Oleg at OK@nms.de
3: Last number on car license plate
4: 1/4 of the 16 openings in the sewer grate ("entrance to the underworld")
2: May refer to Manuel Perez and Ken Morangie, but can also be found by trial and error
Take piece of smelly Pizza
Take Salt shaker
If desired, take Pencil
Back out and take Portable cassette player from the floor
Examine the Portable cassette player in inventory to get its Batteries
Exit to courtyard
Take Motorcycle back to Museum entrance
Click on the Girl on the bench
SleepGet Flat tube from BikeBike
End discussion
Combine Air pump & Flat tube
Take Motorcycle back to Vladimir's House
Use Tube on Bucket of water in courtyard
Combine Rubber glove & Glue
Combine Tube & Sticky rubber glove
Take Motorcycle back to Museum
Use Patched tube on Bike
Talk to Girl
BikeYou now have a CameraEnd discussion
Combine Batteries & Camera
Close Diary
Give Camera to Girl and get Magnet
Take Motorcycle back to Vladimir's House
Enter apartment
Use Magnet with Fish tank to get Key
Take Book from drawer on bed
Examine Book in inventory to disclose a lock
Combine Key & Book casket to get Vladimir's address book & Note
Examine Vladimir's address book in inventory to get address of Oleg Kambursky
Exit to courtyard
Take Motorcycle to Oleg's House
Take blue Plastic bag
Combine Handle & Plastic bag
Go to front door of house and use Doorbell
Back out and go along Path to backyard
Take Broomstick
Combine Reinforced plastic bag & Broomstick
Use Porcelain bowl with Garden hose
Examine Window slit
Back out and exit to street
Return to front door
Put Pizza into feeding dish
Put taped Cell phone on Cat
Use Salt shaker on Pizza
Back out from rear window and exit to street
Use Telephone booth
Use Brailer on Cell phone in tree
Take Motorcycle to Museum
{Cutscene}
The playable demo ends at this point
You are no longer able to return to any other location on the motorcycle
Enter museum and use Stairs at left
Take Plant
Enter Max's office at left
Exhaust all four dialog choices with Max
You now have a Diadem
Use Spoke on Totem to get Red glass bead
Open Refrigerator to get Acid bottle and Cement bag
Combine Flask with stone & Acid bottle to get Amethyst
If the porcelain bowl does not have water in it, go into Vladimir's office and use the bowl with the radiator vent
Combine Porcelain bowl with water & Cement bag
Combine Piece of plant & Porcelain bowl with water and cement to make Putty
Combine Diadem & Putty in porcelain bowl
Combine Diadem & Red glass bead
Combine Diadem & Green shard
Combine Diadem & Amethyst
Return to the dinosaur exhibit and put the Diadem on the Lamp near the Triceratops head
Examine the Plan illuminated on the wall
Back out
Exhaust both dialog choices with Max
Examine the Relief disk
Take Coin from Relief disk, then back out
Return to Vladimir's office and zoom in on the Coin showcase by the window
Put the Coin into the empty compartment
Read the note at upper right to identify the puzzle goal:
Whether vertical, horizontal, or in both main diagonals: make sure that there is never a repeat within a line.In the following diagram, swap coin pairs A, B, C, D, E and F to find one solution:
If the coins are numbered from 1 to 4, largest to smallest, a solution keeping the first column intact is
One other solution keeping the first column intact can be found using the following coin pair swaps and resulting arrangement:
{Cutscene}
Examine Bread box in inventory to get Bread and butter and Rubber band
Take Bricks
Put Bricks under Car's rear axle
Use Bread and butter on Rusty car jack
Take Car jack
Touch Rubble to get Nut and Y-shaped Unidentifiable thing
Combine Rubber band & Unidentifiable thing to make a Slingshot
Combine Nut & Slingshot (or use a Pebble found in the next scene)
Exit to the station Side entrance
Use Loaded slingshot on Lamp above guard
Take Newspaper
If you didn't pick up the Pencil from the desk in Vladimir's house, take one from the side of the guard shack
Exit
Talk to the sewer worker
AngryCombine Newspaper & PencilLottery
End discussion
Give Newspaper to the Sewer worker and he leaves
Take Hose
Take Barrier to get Iron bars and Barrier tape
Exit back to the station Side entrance
Examine Cigarette butts on the ground
Give the Iron bars to Sergeant Yushin to get bent ones
Talk to Sergeant Yushin
CigaretteNow have CigaretteEnd discussion
Exit
Go down manhole (Canal) into sewer
Take Matches
Use Car jack on Door
Exit through door
Use Bent iron bars on Ascent (ladder)
Climb ladder into bathroom
Examine Opening under stall door
Talk to train driver's Legs
End discussionBack out and exit left into changing room passage
Combine Cigarette & Matches
Put lit Cigarette on Dish
Open right-hand Locker and examine it
Take Radio
Examine Radio in inventory to determine that it's #15
Take Stocking
Take Uniform
Back out and exit through door into train station
Exit through Passage to train
Talk to Soldier to find out the Central dispatch code is 48
DepartureReturn to the bathroomEnd discussion
Put Hose on sink Faucet
Put end of Hose in Urinal
Turn on Faucet
Return down to the sewer door
Put Stocking on Pipe
Put Barrier tape on Stocking
Go through the sewer door
Examine Distributor
Turn Wheel on pipe
Exit right to sewer door
Take Stocking with key
Return to the station Side entrance and talk to Sergeant Yushin
FSB agentsNow have FSB agent names Fetisov and RadenkovEnd discussion
Return to the bathroom
Examine opening under stall door
Give Stocking with key to Train driver
Back out and exit to changing room
Use Radio on Nina from 15 to 48 (Central)
FSB agentsExit into train station and enter the game room door formerly guarded by MIB
Examine Solotov to get Dog tags
Examine Dog tags in inventory to get Solotov's service number: 31545
Return to changing room
Open left-hand locker
Use Solotov's code 31545
Examine locker to get Permit
Return to Soldier guarding the train
Give Permit to Soldier
(It's possible to skip the steps with the FSB agents and the game room if you already have the locker code.)
{Cutscene}
Enter the galley in the rear of this train car
Take Honey
Put Honey in Pot
Empty Bottle of orange juice into Pot with ingredients
Fill Empty bottle with water at Faucet
Exit galley and into the next train car
Take White bread
Exit rear into the next car
Take 100 watt bulb from Lamp
Return to sleeping soldier's car
Use 100 watt bulb in Lamp above soldier
Turn on Light switch to wake soldier
Exit galley
Open soldier's Bag to get Castor oil
Take Dried fruit
Enter galley
Put Castor oil and Dried fruit into Pot with ingredients
Put White bread into Pot with laxative jam
Exit galley and enter the next car
Talk to Assistant
End discussionGive White bread with laxative jam to Scientist
Talk to Scientist
Work wagonTalk to AssistantScientists
Sidorkin
End discussion
ScientistsPour Bottle with water onto Power outletEnd discussion
Take Glass containing plant sample from table
Take Glass containing plant sample from floor
Examine each of two Plant samples in inventory to take them out of their jars
Combine both Plant samples together
Combine Plant sample & Sample glass
Put Plant sample in jar onto Small desk
{Cutscene}
Examine Ant
Examine Book
Examine Notes on the computer monitor
Examine File folder
{Cutscene}
Take dog leash
Scroll right and take a Juicy steak from Ice chest
Combine Sample glass & Juicy steak
Take vacuum cleaner Tube
Take vacuum cleaner Hose
Combine Dog leash & Tube
Put Meat in jar into right Cage
Take Piece of bone from left Cage
Use Piece of bone to open Flap in vacuum cleaner
Examine Inside of vacuum cleaner to get Vacuum cleaner bag
Examine Vacuum cleaner bag in inventory to get Barrette and Animal hair
Use Leash with pipe on ceiling Hatch twice
Use Hatch
A "Vagon-Defectoscop" apparently is a railway car for testing the track
Take Leash with pipe
Put Animal hair into right-hand Pipe on top of train car
Use Hose on either roof Pipe to make train window open
Use Leash with pipe on either roof Pipe
Enter Window
Take Skull from skeleton
Take yellow Flower vase
Examine Desk
Unlock Drawer with Barrette
Open Drawer and take Statue
Back out and put Statue in Socket on empty plinth
Turn all four Statues to face left like the Lenin portrait on the wall
Enter secret room and take Book from Torture chair
Exit secret room
Put Book into the open slot in the shelf of Books
Re-enter the secret room to see that a Niche in the wall has now opened
Put Skull into Niche to access the Safe
Examine the Safe to see a puzzle
Nina's comments indicate that all lights should be turned off. A little experimentation shows that pressing any Lamp changes the on/off state of that lamp and its immediate neighbors to the left, right, up and down. A convenient RESET button changes the puzzle back to its initial state with 8 bulbs lit:
Press 5 lamps in the following locations (the order in which you press the lamps does not affect the outcome):
{Cutscene}
Take Textile bag
Take Red berries from Shrub
Combine Textile bag & Red berries
Examine the Ambulance to get its phone number: 03112
Give Dirty bag to Oleg
Use Cell phone on Max
AmbulanceNow in the courtyard, take Surgery pliers
Look at Shadow, then at Lamp
Use Surgery pliers to get Key from Lamp
Use Key to unlock cellar Door
Enter cellar
Take Handheld fan
Examine open drawer of File cabinet
Take Anesthetic from Bottles area
Go through door into next room
Take Ammonia gas
Take Stethoscope
Take Syringe
Take Scalpel
Use Stethoscope on Door at right
Exit through door at right
Return to courtyard
Exit left to front of building
Use Scalpel on Satellite dish to make the guard leave his TV
Exit right to courtyard
Use Stethoscope on Pipe
Use Ammonia gas on Pipe
Use Handheld fan on Pipe to wake up Nina
Activate Nina using the icon at lower right
Take Crocheted place mat that was being used as a pillow
Use Crocheted place mat on Sharp edge of wall to get Thread
Take Small stone
Combine Thread & Small stone
Use Tied-up stone with Drain
Activate Max
Use Scalpel on Pipe to send it to Nina
Switch to Nina
Use Scalpel on Chair leg
Use Scalpel on Mattress to get Foam
Send Chair leg and Foam down the Drain to Max
Switch to Max
Combine Syringe & Chair leg to make Blowgun
Combine Anesthetic & Blowgun
Return through cellar to TV room
Remove Wedge from safety door
Use Poisoned blowgun on Peephole in door
Use Foam with Dish of cheese soup by TV
Get Tack from Pinboard
Combine Anesthetic & Tack
Return to courtyard and send Chair leg and Cheesy foam to Nina
Switch to Nina
Combine Thread & Cheesy foam
Take Bowl
Combine Chair leg & Bowl
Combine Tied-up cheesy foam & Rat trap
Use Rat trap with bait in Rat hole
Get Rat from Rat trap
Send Rat to Max
Switch to Max
Return to TV room and exit via Stairs at right
Use Rat on Guard
Use Poisoned tack on Chair
Go back upstairs and examine Guard to get Key to cell
Use Key to cell on Door to free Nina
{Cutscene}
Take Ketchup
Take First aid kit
Examine First aid kit in inventory to get Vodka
Back out and take Spade from back of Jeep
Scroll right and use Spade on Crate
Take Destroyed crate
Enter tent
Take Wooden spoon
Take Cup
Take Grate
Take Scissors
Take Tassel to get twine
Exit
Scroll right and use Spade on Tree
Use Cup on tree Resin
Take Bark
Follow the path to the right
Take Pointed stone
Combine Scissors & Pointed stone
Use Spade to dig up Gentian flower
Use Grate on steaming sulfur Hole
Follow the path left
Scroll left to the water barrel
Use Bark on Water basin
Remove Plug from barrel
Use Sharp scissors on Reindeer to get Reindeer hair
Combine Twine & Reindeer hair
Combine Wooden spoon & Wisp of hair to make Brush
Use Cup on Water basin
Return to the sulfur hole
Put Cup on Grate, then retrieve Cup
Combine Brush & Cup
Take Grate
Re-enter tent
Use Brush with resin on Snippets of parchment in fireplace to discover a Recipe for healing:
5 parts of the Source of LifePut Debris from a crate into Fireplace
2 parts of Root of Tears
1 part Blood of the Night
3 parts Drops of Intoxication
To be taken shortly before it unites with the wind
Put Grate in Fireplace
Give Recipe parchment to shepherd Evenk to get a Vial
Combine Vial & Ketchup
Combine Vial & Vodka
Put Vial in Nutcracker
Put Gentian in Nutcracker
Take Vial
Exit tent and use Vial on Water basin
Re-enter tent
Use Matches on Fireplace
Put Vial on Grate
Take Vial
Give Vial to Evenk
{Cutscene}
Take left path to generator shed
Take Oil lamp
Take Hose
Take path at the top of the screen
Examine the Wheel rim on the truck to get two wing Nuts
Use Hose on Tank
Use Vodka bottle on Tank to get Bottle with diesel fuel
Return to the shed
Use Bottle with diesel fuel on generator
Use Nut with generator Coil
Take the path to the right and enter the cabin
Take Glass shard
Take Rag
Combine Oil lamp & Rag
Exit cabin and use Saturated rag on Window
Re-enter cabin and examine Chimney
Use Oil lamp on Chimney to shed some light
Take Aluminum foil
Combine Glass shard & Aluminum foil
Use Saturated rag on back wall of Chimney
Examine back wall to disclose a code: 7 1/2 - 3 - 10 1/2 - 6
Note that on a 12-hour clock, these numbers could correspond to compass directions: SW - E - NW - S
Back out from chimney
Examine Compass
To dial in the combination SW - E - NW - S, put one or two magnetized wingnuts on the corresponding metal pegs and then press the center compass button:
1. S and WNote that all wingnuts used must be returned to inventory before they can be reused.
2. E only
3. N and W
4. S only
Examine the Secret compartment to get Film feel
Use Film reel on Projector
Try to operate the Projector to determine that its bulb is burned out
Use Shard in aluminum foil on Projector
Operate Projector
{Cutscene}
Enter through front door into foyer
Talk to dancing receptionist nurse
MusicUse Magazine stand to get NewspaperPolitics
End discussion
Exit towards the bottom of the screen into the card room
Take Glasses
Talk to Patient
House of cardsReturn to the street and enter the courtyard through the arched gate at rightEnd discussion
Get Log from Stack of wood
Exit right to kitchen
Take Meat fork
Take Sausage tongs
Take Weights
Put Log into Stove
Put Newspaper into Stove
Use Glasses with Stove to light fire
Use Sausage tongs on Stove to get Charred log
Return to the card room
Put Weights on Record player
Return to the street and talk to the Gate keeper artist
Portrait of SabrinaGive Charred log to Gate keeperEnd discussion
Portrait of SabrinaNow have Wrapped portraitEnd discussion
Return to foyer
Give Wrapped portrait to Female nurse Sabrina
End discussionReturn to the courtyard
Talk to Worker
WorkExit right to kitchenBreak
End discussion
Put bag into stove
Return to card room
Put Portrait of Sabrina on Copier to get Copied pictures
Return to foyer
Give Copied pictures to Sabrina
Exit to upper left
Enter door on the right
Examine bed to view newspaper clipping
Back out
Examine Surveillance camera
Examine Tiles that fell out of the wall
Examine floor Stains
Examine Scratches on the wall
Only after everything has been examined are you allowed to leave the cell
Return to foyer
Talk to Sabrina
Perez's cellReturn to courtyardEnd discussion
Combine Meat fork & Portrait of Sabrina
Put Skewered portrait onto Door frame
Open Door and enter control room
Examine the Picture on the left wall, describing:
1-legged pirateThis suggests the series of numbers 1 4 2 8
(4-legged) cat
(2-legged) parrot
(8-legged) spider
Click on the Safe
Enter the combination above to get a Videotape
Put the Videotape into the VCR
{Cutscene}
Nina and Perez are now at a beach cave
Use the Stairs to exit back to the street
Enter courtyard
Take Skewered portrait
Enter kitchen at right
Use Sausage tongs on Stove to get another Charred log
Return to the beach cave via the street
Talk to Perez
FatherGive Portrait of Sabrina and Charred log to PerezEnd discussion
{Cutscene}
Exit down the Stairs to the pier
Take Stone
Get a Fish from the Barrel
Combine Sign & Fish
Talk to Fisherman
MorangieGo back up the Stairs to the roadBoat
End discussion
Take red Flag
Put Flag on Traffic sign
Touch Traffic sign to get Wet flag
Enter pub
Put Fish on sign in Chimney
Use Wet flag with Fish on baking sheet
Take Tumbler
Give Fried fish on sign to sleeping Guest (Klaus)
Return to the pier
Use Tumbler with Sea
Return to the road
Put Wet flag on Traffic sign again
Re-enter pub
Talk to Barkeeper
LemonGo outside and open Crate to get LemonPub
End discussion
Enter pub and give Lemon to Barkeeper
Put Tumbler with water in Chimney
Take Tumbler from Chimney
Examine Tumbler in inventory to get Salt
Put Salt into barkeep's abandoned Tumbler
Take Key
One legendary pun later, exit the pub and return to the pier
Fill Tumbler with Sea water again
Use Key on cellar Door and enter cellar
Take Torch
Take Whiskey bottle
Exit
Give Whiskey bottle to Fisherman
Use Boat
You are now in the courtyard of Morangie Castle
Take Sword
Take Shutter
Enter the middle door (in the angled wall) to the castle office
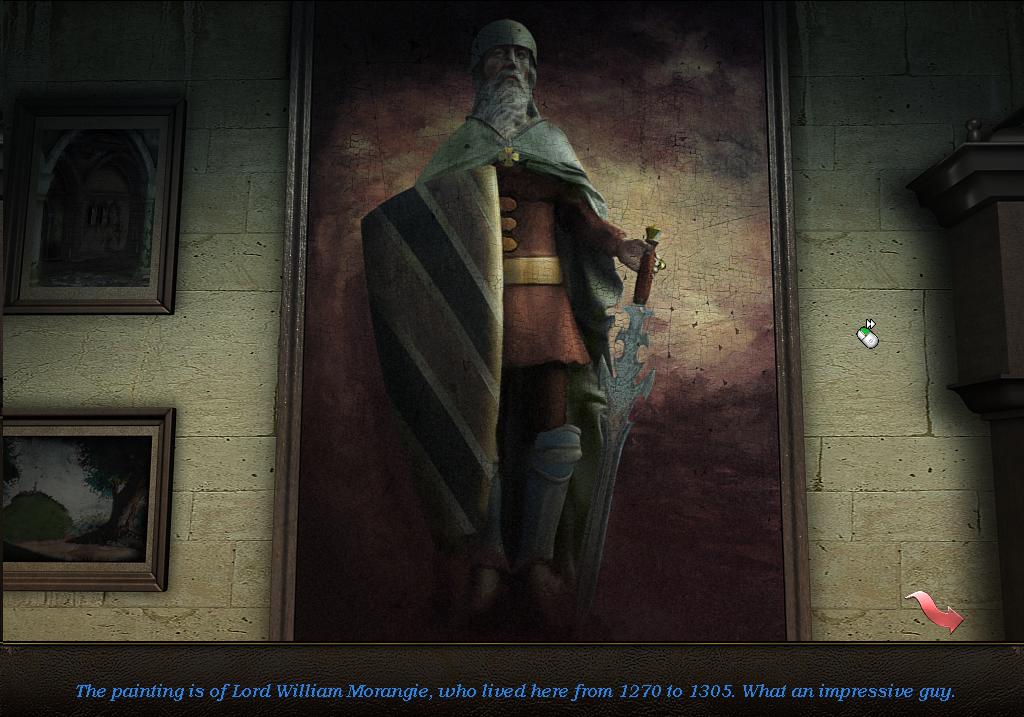
Examine the Painting above the desk
This painting of a previous Lord Morangie shows him attired with amulet, shield, sword, shin guards, helmet, etc.
Back out and exit right upstairs to a hexagonal landing
Take Oil lamp
Get Spearheads from Showcase
Examine Books to learn that Lord Morangie's ancestor was buried without a funeral pyre
Go back to the courtyard
Go through the far right doorway into the crypt
Use the Torch in inventory with the lit one on the wall to get a Burning torch
Exit to the courtyard and enter the upper left door to the hallway
Take some Wire from the candle holder
Take the middle exit (darker of the two doorways) into the bedroom
There is a statue of Lord Morangie here that seems to be missing some details like a sword and shield that were seen in the painting in the castle office
Put the Shutter on the Statue to simulate a shield
A hidden mechanism is triggered
Put the Sword on the Statue
Examine the nightstand (Commode) to get a Gold coin
Return to the hallway and take the brighter-lit exit into the torture chamber
Take Iron chain
Take Pliers
Use Burning torch with Fireplace
Combine Gold coin & Pliers
Put Pliers with gold coin into Fireplace
Put Pliers with red-hot gold coin into the Iron maiden
Combine Pliers with red-hot gold ring & Tumbler with water to get Gold ring
Return to the courtyard
Take the exit at the bottom of the screen back to the pier
Enter the cellar
Put the Spearheads into the Bench vise
Scroll right and use the Pliers on the Board
Put the Long board into the Bench vise to cut it down to size
Exit the cellar and go up the Stairs to the road
Take the Rain gutter from in front of the pub
Return to the pier and take the Boat back to the castle
Return to the torture chamber
Use the Rain gutter on the Rack
Take the Rain gutter pieces that now look more like shin guards
Go back to the castle office
Put the Board on the Stool
Put the Stone on the Board
Go upstairs to the landing
Use the Lever to drop the chandelier and pop off the chimney cap in the courtyard
Return to the courtyard
Take the Chimney cover
Go to the bedroom
Put the Chimney cover on the Statue
Put the Gold ring on the Statue
Put the Rain gutter on the Statue
Move the Curtain at right to disclose an exit
Exit through the passage at right into the dungeon
The gates and other obstacles in this area have been opened as a result of the items placed on the statue in the bedroom
Examine the Niche in the wall to get a Key
Return to the crypt off of the courtyard
Use Oil lamp on Coffin
Use Burning torch on Coffin
Use Key in Opening
Take Amulet
Combine Wire & Amulet
Combine Iron chain & Amulet with wire
Return to the bedroom
Put the Amulet on a chain onto the Statue
Go back through the dungeon and exit to the left
Open the circular door to release a surprisingly-dry Lord Morangie from the bottom of the well
{Long cutscene}
Take yak Skull
Exit left
Use Peg with Rock
Take Bag from water
Examine Bag in inventory to get Bone
Exit right
Put Bone into bottom Hole of three
Exit left again to see that a new doorway has opened
Exit into red Passage
Examine Stone slab underneath Head of stone
Arrange stones in the same pattern as the diagram on the last page of Evans' travel journal (email in inventory):
Examine Stone disk in mouth of stone head
Back out
{Cutscene}
Take Plunger and Toilet paper
Exit bathroom into machine shop
Examine Armoire (wall cabinet) to get Tapper, Y-shaped Piece of something and Silicone
Take Metal plate
Take Key
Put Piece of something on Bench vise
Combine Key & Bent piece of something
Put Metal plate on Drill
Put Toilet paper on Metal plate
Use Drill to make fire
Put Piece of metal and key on Burning paper
Take Metal plate
Use Piece of metal and hot key on door
Exit room onto catwalk
Exit left into control room
{Cutscene}
Examine Armoire (locker) to get Explosive
Exit to catwalk
Exit right into frozen room
Take Fishing rod
Exit up Stairs back to catwalk
Use Fishing rod on Platform at bottom of right-hand elevator shaft to get winter clothing
Use Fishing rod on elevator shaft Platform again to get Laundry ball
Use Metal plate on elevator shaft Platform
Exit right
Exit outside
Take Bucket
Exit right to whaling ship
Examine Jacket to get Hip flask
Use Laundry ball on Barrel
Exit left twice to penguin area
Take Sign
Use Explosive in Hole
Exit to Crevasse
Examine Dead man to get Amulet, Lighter and Diary pages
Combine Fishing rod & Lighter
Return to catwalk area inside station
Put Laundry ball in whale oil on elevator Platform
Exit back to machine shop
Use Plunger on Incubator
Use Amulet on Incubator to get Strange egg
Exit to catwalk, then exit right
Use Bucket on Salt pile
Return to whaling ship
Use Bucket of salt on Hole in ice
To simulate time passing, re-enter station, then return to whaling ship
Use Fishing rod with bait on Hole in ice to get Fish
Exit left twice to penguin area
Give Fish to Penguin
Put Strange egg in inventory on penguin's Egg
Return to frozen room inside station
Use Egg on Machine to turn on water system
Return to machine shop
Put Hip flask on Drill
Use Drill to get Cork
Exit right into bathroom
Put Cork in Bathtub
Use Bathtub to fill tub with water
Return to frozen room
Take Egg from Machine
Return to bathroom and bathtub is now frozen
Open Camera to get Videotape
Return to control room
Put Videotape into VCR
{Cutscene}
Look at last page of Diary (at lower right, not in inventory) to see number on bridge control panel: 2513
Exit control room
Use Keypad
Enter code above to extend bridge
Open Door across bridge to enter radar room
Open Crate to get Beacon (flare) and Matches
Return to the whaling ship
Use Beacon on whale oil Barrel on ship
Use Beacon with Harpoon gun on ship
{Cutscene}
Take Elevator down
Exit through Door at far left into storage room
Take Wrench
Use Silicone on Danger sign to get Mold
Combine Wrench & yellow Sign to get Extended wrench
Exit room
Use Extended wrench to get Icicle
Return to storage room
Put Icicle on Chain
Move Chain to Pipe
Take Nut that fell from the pipe (may be hidden behind Nina)
Exit room
Use Tapper on Valve to thread its rod
Put Nut on Valve
Use Extended wrench on Valve
Touch Radiator
Use Lighter with Camera
Use Mold with Camera
{Cutscene}
Give Egg to Oleg
Use Cell phone on Machine
Click on Camera, then on Crane
{Endgame cutscene}
Copyright © 2017 Balmoral Software (http://www.balmoralsoftware.com). Portions copyright © 2006 Animation Arts Creative GmbH & Fusionsphere Systems Ltd. All rights reserved. Republication, redistribution or conversion is expressly prohibited without the prior written consent of Balmoral Software.