✓
position
Plants

Office


Entry
Hall


Copyright © 1996,2023 Balmoral Software (http://www.balmoralsoftware.com). Portions copyright © 1995 Sierra On-Line, Inc. All rights reserved. Republication, redistribution or conversion is expressly prohibited without the prior written consent of Balmoral Software.
There are essentially two main stages in the game. The first part involves identifying where all the pots and lids are located, as well as with which Ixupi they can be used (one pot+talisman per Ixupi). You can only carry one item at a time, so you'll need to keep track of the locations of the pots and lids as you proceed through the museum. Along the way, you'll need to solve a variety of standalone puzzles to gain access to items or to other areas of the museum.
The second phase of the game involves tracking down each cartoonish Ixupi with the corresponding pot+talisman combination, and defeating them one by one. The Ixupi themselves are located randomly in multiple locations in the museum, and can change positions at will. When that phase is completed, there is a brief endgame sequence, followed by an optional exploration mode in which you can move freely around the museum re-solving its puzzles, but without ghostly threats.
Over 20 puzzles are encountered within the game, some of them rather unique. About half of the puzzles have fixed solutions, but the remainder have randomized beginning or ending states. All puzzles either control access to an Ixupi pot or lid, or to a previously-inaccessible area in the museum. Once they are initially solved, all puzzles (except one) remain in that state for the rest of the game. The exception is the elevator puzzle, which requires a new puzzle to be solved every time an elevator is used. If a door access puzzle has been solved, you can open the door by clicking on an area below the puzzle.
There are only 20 saved game slots, with names limited to 8 characters without numbers. More numerous saved games can be manipulated externally by copying groups of files in the \Saves subfolder of the game installation location. When starting a New Game, your entry in the "Museum Guests" book becomes the name of your first saved game. This walkthrough uses the following abbreviations for the node-based movements in the game:
F: Forward (Fn for n repetitions)Press [Esc] twice to skip the game introductory sequences and reach the main menu. Beware of rustling or unusual noises (other than strange music) when exploring -- it could indicate the proximity of an Ixupi. You can be attacked repeatedly by an Ixupi, and they can change locations at will. Your score is decremented each time you are attacked by an Ixupi.
L: Left
R: Right
| Ixupi | Pot | Lid | Captured ✓ | Toolbar position | ||
|---|---|---|---|---|---|---|
| Image | Location | Image | Location | |||
| Ash | | Amazing Plants | | Museum Office | 7 | |
| Crystal | | | 2 | |||
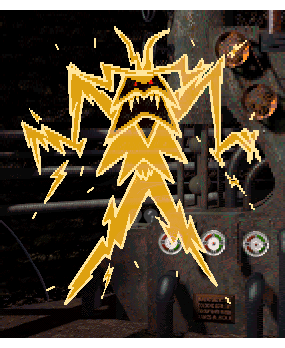
| Electrical | | | Main Entry Hall | 6 | ||
| Fabric | | | 9 | |||
| Metal | | | 3 | |||
| Sand | | | 1 | |||
| Tar | | | 4 | |||
| Water | | | 8 | |||
| Wax | | | 10 | |||
| Wood | | | 5 | |||
Item Location Intro Movie Start of new game Beth's Ghost Clock tower Merrick's Ghost Fortune Teller's room Windlenot's Ghost Far side of Underground Lake Ancient Astrology Backpack in Myths and Legends Scrapbook On desk in Museum Office Museum Brochure In desk drawer in Main Entry Hall In Search of the Unexplained Pale orange book on top shelf in Library Egyptian Hieroglyphs Explained Near side of Underground Lake South America Pictographs White book on top shelf in Library Mythology of the Stars Purple book on middle shelf in Library Black Book Tilted green book on top shelf in Library Theatre Movie Projection Room Museum Blueprints Bimini Island pedestal in Mysteries of the Deep Beth's Address Book On stairs in Corridor 1 Merrick's Notebook Under lion coffin in Funeral Rites Professor Windlenot's Diary On desk in Bedroom Finale Generator room in Power Plant
Ixupi Possible locations Ash Fireplace in museum office
Ashes in cremation platform in Funeral RitesCrystal Chandelier at the top of the spiral staircase in Main Entry Hall
Crystal display in Mysteries of the DeepElectrical Light bulb in Planetarium
Electric chair in Man's Inhumanity to Man
Generator in museum Power PlantFabric Mummy's rags in Tombs and Curses Room
Cloth pieces in bathroom behind Myths and Legends
Burial cloths in Funeral RitesMetal Unicorn statue in Strange Beasts
Film canisters in Projection Room
Armor in Bedroom/StudySand Poseidon's Temple in Mysteries of the Deep
Sand at base of cactus in green tower in Amazing PlantsTar Tar pit in Strange Beasts
River of tar in Subterranean WorldWater Underground Lake
Fountain in Main Entry Hall
Toilet bowl in bathroom behind Myths and LegendsWax Candelabra in Library
Wax effigy in Shaman Room
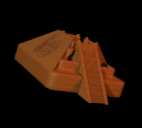
Wax snake in Myths and LegendsWood Pile of planks in second-floor secret passage
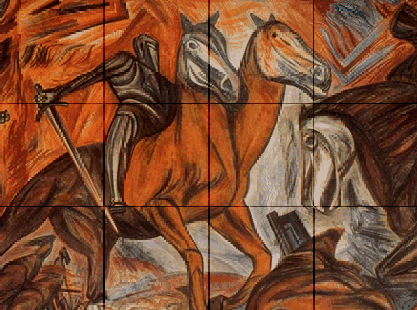
Wooden slats from flying horse crate in Myths and Legends
Tiki statue in Gods and Religious Items
Partially-uncrated statue in museum workshop
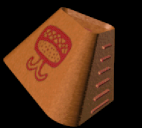
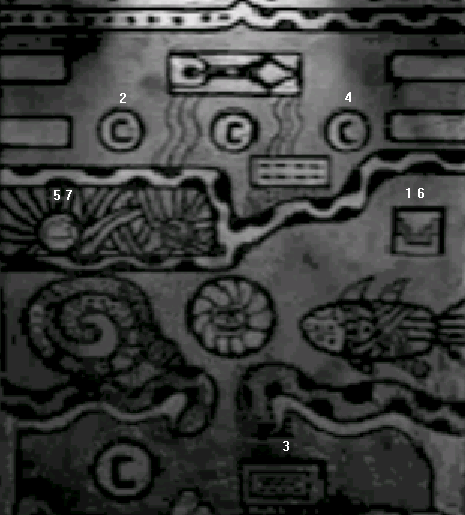
Go back down the stairs and follow the path to the right of the museum gates until you reach an irregular statuary with several squares on its front face. Go around behind this statue and note the green design on the ground, looking like a circle with fan blades. Return to the path and follow it under a textured semicircular arch. Immediately turn around and zoom in on the white design displayed on a dark blue triangle, looking like a large S with spirals. Turn around and return under the arch. Zoom in on the bench to disclose a torus-shaped design on the front side of the brown wooden bench.
Continue to the end of the path. There doesn't seem to be any way to cross the water, so back up and enter the gazebo. Zoom in on the control panel and enter the combination from the mailbox: 029, from top to bottom. Press the red button to open the lid of the control panel, disclosing a gear assembly inside. The gears puzzle is solved by exchanging the white and black gears in seven moves. Using the gearpost notation
a solution is
1 2 3 4 5 6 7 8
Move black gear from 2 to 1(gearpost 8 is not used). Turn the crank to raise the stepping stones across the water. Exit the gazebo, turn right and cross the water to the Stonehenge display. By looking through the left arch, check out the tan-colored design carved into the rocky hillside of the museum, looking like a cross inside a circle. Look down to see the hexagonal museum entrance puzzle. Its solution is entered using the six colored symbols seen earlier:
Move white gear from 6 to 2
Move black gear from 4 to 6
Move white gear from 7 to 4
Move black gear from 3 to 7
Move white gear from 5 to 3
Move black gear from 1 to 5
Follow the spiral staircase down and open the one-way door at the bottom. Enter the passageway and turn left to the switch panel. Open the panel using the red button and turn on the lights by dragging the large switch downwards. Follow the tunnel to its end. Open the door; beware of the bats! At the shore of the subterranean lake, be sure to take a look at the "Egyptian Hieroglyphs Explained" book from the corpse at left. This book, like all written materials encountered in the game, is stored in the Flashback section of the game's main menu. Note that the dead person has traced out a spiral symbol symbol before dying.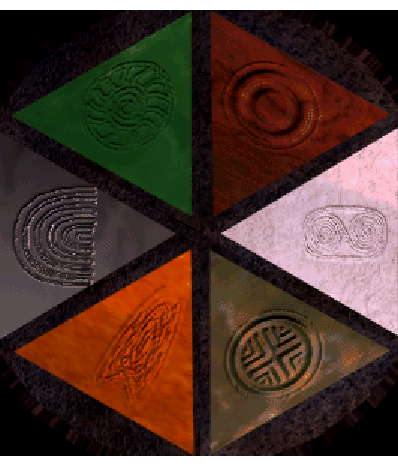
Turn away from the corpse and go aboard the boat. Turn left and you can see the corpse in the distance. Look down and be sure that the lever with the ankh on it is pulled forward toward you, which disables the boat moving backwards. Turn around and look down at a similar mechanism on the other side of the boat. Move the ankh lever into a vertical position, then look up and use the crank of the red handle four times. After the third time, you'll be attacked by the Water Ixupi and will lose some of your green health bar shown at the bottom of the screen. There's no way to avoid this attack, but you can make up the lost life essence later. At the other shore of the underground lake, exit the boat to the left and move F R F R. Click on the orange pot at the base of the girder to learn something of the museum's backstory from Professor Windlenot's ghost.
Move through a twisting passage until you reach a set of doors for Elevator A at the end. Note the video camera at upper left; you'll visit its control room later. Solve the elevator puzzle and then take it up to the main floor. Exit Elevator A into the Museum Office.
There is a map on the wall with Atlantis (Bimini Island) coordinates circled (75 W, 20 N). Backstory items here include a letter in the upper-right desk drawer, a scrapbook and tape recorder on the desktop, and a newspaper in the pocket of the hanging coat referring to the lost teenagers Beth Nelson and Merrick Campbell. Elevator B to Windlenot's bedroom can be accessed under a tapestry to the left of the door to the main hall.
A sheet of paper on the central table has bone fragments numbered 65b, 342a, 241, 109, 490 and 147. To access the pot/lid in this room, go to the far left corner and open only the 6 drawers not corresponding to the bone fragments listed on the paper, shown with asterisks on the following diagram.
Turn the key at the bottom to open the cabinet below.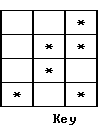
To reach this location, use Elevator B behind the wall tapestry in the museum Office. Backstory information here includes Professor Windlenot's journal on the desk, in which we learn that Windlenot's son's name is Geoffrey. The clock on the nightstand seems to read 5:30, but its hour hand isn't in the correct position. The wardrobe is reminiscent of that scene in The Fly.
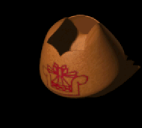
The transforming masks are located to the left of the door to the Library. There is a valve in a hatch at the base of the fountain to turn on the water, which needs to be running for the Ixupi to appear there. Zoom in on the desk next to the spiral staircase at the far end of the entry hall. Open one of its drawers to examine a museum brochure in which a selection of exhibits have associated color-coded skulls:
As you might expect, the Library contains several puzzle clues in various books. Starting at the entrance door from the entry hall facing the library table, move left and check the cabinet under the bookcase for a pot or lid. Turn around and approach the opposite bookcase (beware the candelabra at left). In the middle of the top shelf is a tilted, dark-green book which has the same spiral symbol on it that you saw by the corpse at the underground lake:
This "Black Book" has some backstory information. Two books to the right is an orange volume "In Search of the Unexplained" containing some extraterrestrial diagrams that can be used in the planetarium. A bit further to the right is a white book "South American Pictographs", in which all of the Ixupi pot symbols are shown. These symbols are essential for matching correct pots with Ixupi.

On the second shelf is a purple book "Mythology of the Stars" with some planetary information. There are also lower cabinets here, but they have no purpose.
Go to the other end of the library and you'll find a ladder that you can slide to the right. After moving the ladder, climb it to the top and pull the largest book on the top shelf to rotate the statue at right and disclose the hiding place of a pot or lid. It may be more convenient to move this item to the cabinet you opened when first entering the library.
All Library books appear in the Flashback menu.
To solve the theatre entrance puzzle, refer to page 16 of the "Egyptian Hieroglyphs Explained" book in the Flashback menu (this book was encountered before crossing the underground lake at the beginning of the game). This Egyptian compass puzzle starts randomly each time it is played. The answer is:
There are enough open spaces to solve the puzzle by swapping pieces. It may be easier to place larger pieces first.
Once inside the theatre, climb onto the left side of the stage and proceed through a hallway to the first corner. Here there is a pointed wooden door with a word wheel puzzle on it that provides access to the clock tower, as shown on the Main Floor Map. Continue down the hallway to the next corner. Turn right and note an access hatch that can be opened with the blue button at upper left. This provides a one-way path into Corridor 1 behind the library. Continue around the corner and climb the stairs into the projection room. At left is a stack of film canisters where the Metal Ixupi sometimes lurks. Move towards the far corner of the room where the projector stands. Click a few times on the upper reel to rewind the film and make the button at lower left turn green. Press the green button to watch the movie. Professor Windlenot, sounding like David Attenborough, is dressed like the corpse seen earlier on the shore of the underground lake, so that must have been him. Playing the movie opens the curtain on the right side of the stage and allows a pot/lid behind the podium to become accessible.
In the movie, Professor Windlenot shows that he can open a wall in a tunnel by pressing its buttons in order from 1 to 7:
Access to the clock tower is through the backstage door in the theatre containing a word wheel puzzle. Using the clue seen in Elevator C, spell out GEOFFREY (the name of Professor Windlenot's son) in the right hand portion of the word wheel. After the door opens, climb up the circular stairs. When you reach a piece of broken chain on the stairs, access the vertical chains in the wall. Number the unbroken chains from 1 to 4, left to right. According to the professor's diary in the bedroom, the time to set is 5:30. If you've never touched these chains before, the time on the clock tower will be 12:00 and you can achieve the desired time by clicking on Chain 2 twice and Chain 3 six times. This occurs because each pull of a chain modifies the current time by:
Chain 1: +5 hoursPulling the chains as described above modifies the 12:00 time by
Chain 2: -5 hours
Chain 3: +35 minutes
Chain 4: -35 minutes
Continue up the stairs and ladder into the tower. If you've successfully set the chains below, you can access a pot or lid from inside the golden dragon's open mouth. Otherwise, you'll need to discover the current clock tower time in order to determine how to pull the chains. On the video camera console in this room, click on the red button at lower left and drag the joystick under the large central display to the right to determine the current time shown on the clock tower (initially 12:00). As in the Professor's bedroom, the clock conveniently has its hour hand pointing exactly to the hour, rather than operating like a true analog clock. Make a note of this time.
While in the tower room, there are some more tasks to complete. At the video console, click on the red button at middle far left, just above the one for the clock tower, which shows a view of the shaman's room. Manipulate the joystick under the large central display to display a message from Merrick to Beth with the solution to the shaman drum puzzle:
RAMTA BOBA TARAMBAOther locations that can be seen on the video console are:
The Strange Beasts and Corridor 1 views contain some video of Merrick and Beth dropping things.
Tombs
and
CursesPlanetarium Subterranean
WorldCorridor
1Shaman Funeral
RitesMain
Entry
HallPuzzle
RoomExterior
clock
towerGazebo Strange
BeastsElevator
A
Next, turn right and access the jukebox. There are 9 selections that will play,
but the important one is
A pot on the other side of the room contains Beth Nelson's ghost.
If you haven't yet accessed the pot or lid from this room, go back down the circular stairs to the wall chains. Using this table and the clock tower time you noted earlier, pull the chains the appropriate number of times. If desired, return to the tower room to verify access to a pot or lid.
This room is accessible though an elaborate doorway from the Main Entry Hall. The ladder to the eagle nest is across from the triceratops dinosaur. This nest is referenced in the Museum Brochure, so the top color on the skull dial in this room should be set to blue. A backstory item here is Merrick Campbell's asthma inhaler on the floor.
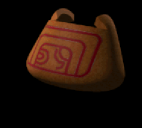
The pot shelf is to the left when entering the room. The planter where the Sand Ixupi may be lurking is to the right when entering the room, below the red wall.
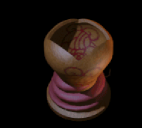
To disclose Bimini Island, zoom in on the globe held by the green Poseidon statue and enter the Atlantis coordinates seen on the wall map in the Museum Office (75 W, 20 N). An island pedestal is then exposed, the back side of which is open. There may be a pot or lid here, along with museum blueprints.
To reach the crystal display, follow the passage along the wall behind the Poseidon statue, starting at the base of the entry stairs.
To access other areas in the basement of the museum, go to the far end of the room and zoom in on the placard for the green Sirens statue. Bring up the game's control menu and make sure it indicates "Text on". Select Play to return to the game and press the red button on the placard to disclose a visual representation of the sirens' song:
Back out and turn right to access an organ. Let the clamshell keys of the organ be numbered 1 to 7, left to right. Play the Siren song to open a secret door to the Basement Maze and Subterranean World: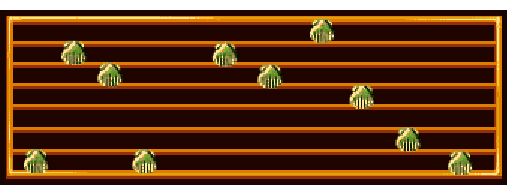
1 6 5 1 6 5 7 4 2 1The door is a large green stone mask on the wall behind the organ.
To reach this location, solve the Sirens puzzle in Mysteries of the Deep and descend the steps behind the green mask door. At the end of the lower passage, solve the Tunnel Wall puzzle as shown in the theatre movie. When the wall opens, move straight forward through two portals ahead until you can't go any further. Then use the move sequence
R F2 L F2 R F2 R F L F2 L F R F2 L F R F2into a room with a subterranean river, known as the Subterranean World.
This location is reached at the end of the maze leading from Mysteries of the Deep. Before attempting to cross the subterranean river, turn left and read the placard on the far side of the room to learn about the Dero. This information is referenced in the Museum Brochure, so the top color on the skull dial in this room should be set to yellow.
Cross the river if you dare, and pick up a pot or lid at the top of the stone portal. Continue through the twisty passages ahead and climb to the top of two sets of stairs. At the top of the stairs, move L F R and click on the dim, partially-open panel to gain access back to the main entry hall, coming out through a small wooden panel at the base of the steps leading up to the receptionist's desk. This panel is inaccessible from the entry hall side until you've been through the basement maze.
If you are unable to cross the river and don't want to restore a previously-saved game, turn around and go straight back through the tunnel as far as possible, then move
L F R F2 L F R F2 R F L F2 L F2 R F2 L F7 R F6back into Mysteries of the Deep.
This room is at the top of the spiral stairs leading from the main entry hall, opposite the library. After opening its entry doors, make a U-turn to the right (F R F R F) to discover a hatch in the green wall that leads to Corridor 2. Spin the leaf symbol above the hatch when you want to open it. To the left of the green hatch is a placard describing the Tomb of the Ixupi, which is in the alcove to the left. As you know by now, all the Ixupi pots that are supposed to be here have been distributed around the museum. The pictures above the pot platforms describe the risks of releasing the Ixupi into the world, and several of them have the spiral Ixupi symbol seen earlier in the library. It is also displayed on the floor in the main room. Opposite the green hatch is a skull dial. Since the Ixupi tomb is referenced in the Museum Brochure, the top color on the skull dial in this room should be set to green.
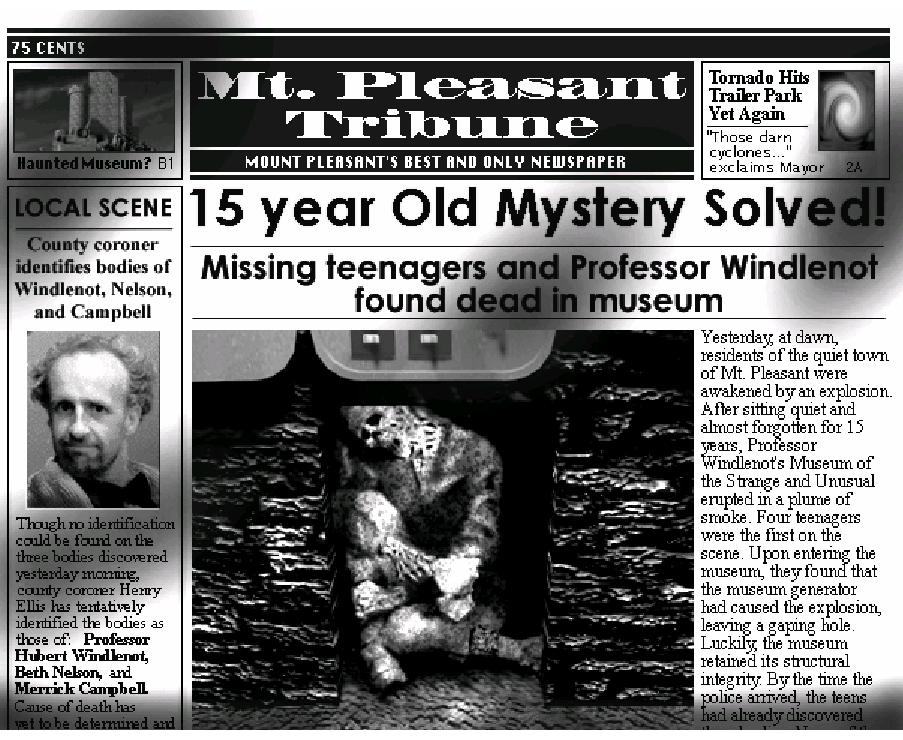
In the Ixupi alcove, note that there are 13 platforms for Ixupi pots. Only ten of these will be used to capture Ixupi in the game. As you will soon find out if you haven't already, the fire, jade and stone pots have already been used to capture Professor Windlenot and students Merrick Campbell and Beth Nelson, in the underground lake, fortune teller room and clock tower, respectively.
In another alcove on the other side of the main room is an Egyptian sphinx facing a sarcophagus. Click on the area between the front legs of the sphinx to open stairs you can use to reach its mouth button. The sphinx will make a reference to a pharaoh that drove out many gods. The solution can be found in the Egyptian Hieroglyphs Explained book:
Turn around and enter these cartouche patterns on the two columns flanking the sarcophagus in order to access a pot or lid inside the sarcophagus.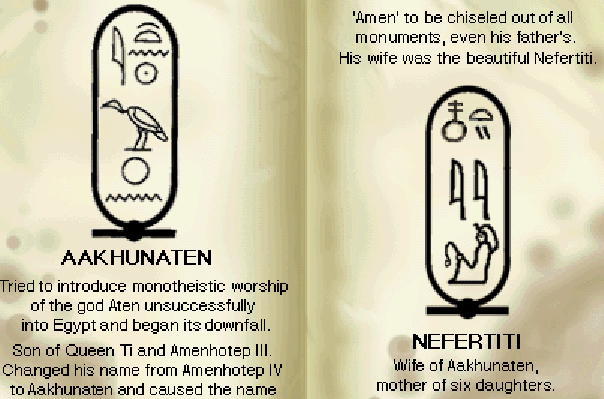
Another alcove to the right of the sphinx leads to a tomb flanked by Anubis statues. Opening the casket may release an Ixupi from the mummy inside.
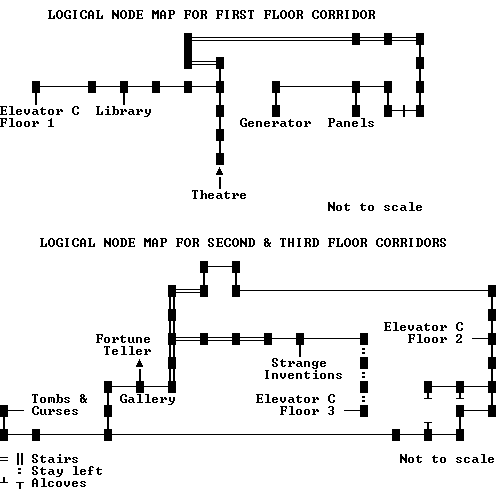
Corridor 1 is an industrial, subway-like passage on the main floor accessible from the Library, from Elevator C, and through a one-way passage from the back hallway of the Theatre. This corridor has several of what appear to be circular doors with skulls or skeletal hands mounted on them, but all of these are simply decorations and cannot be opened in the game. There are a couple of backstory clues here, including Beth Nelson's student progress report and her high-school identity card. In the corner of the corridor is a stairway down to a lower corridor, where you can find Beth's purse with her address book containing a diagram of a "red door":
At the end of the lower corridor is the museum power plant, to which we'll return later. For an essential clue, enter Elevator C and note the diagram on the wall of the elevator car on which Beth has started to write the name "Geoffrey".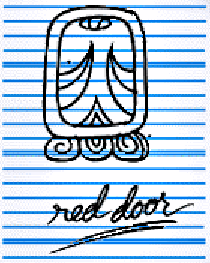
Corridor 2 is a formerly-decorated but now run-down secret passage on the second floor of the museum that is accessible from the Tombs and Curses room, from Elevator C, and downstairs from a similar corridor on the third floor. This corridor contains the Fortune Teller room. Nearby that location is a gallery of famous paintings, all of which are strangely reversed, including Edgar Degas' Woman in a Tub, Claude Monet's Water Lilies and Vincent Van Gogh's famous self-portrait.
Corridor 3 is a lath-and-plaster secret passage on the third floor that is accessible from the Strange Inventions room, from Elevator C, and upstairs from Corridor 2.
To avoid getting lost, move sequences through the corridors are listed in the following table:
Routes through Corridors
From To Route Open hatch in
Tombs and CursesStrange
InventionsF L F L F2 L F2 R F2 L F2 R F4
Click twice on the wooden panel
FOpen hatch in
Tombs and CursesElevator C F L F L F5 L F R F L F3 L
(Keep contact with the right wall)Open bas-relief in
Strange InventionsTombs and Curses F L F4 L F2 R F2 L F2 R F2 R F R F2 Open bas-relief in
Strange InventionsElevator C F R F R F3*
Elevator panel is aheadElevator C
Floor 3Strange
InventionsF L F3* L F
Click twice on the wooden panel
FElevator C
Floor 2Tombs and Curses F R F3 R F L F R F5 R F 4 F2 *: Stay left
Optional Activity
The Fortune Teller's room is sequestered within the secret passages on the second floor. Visiting it is optional for completing the game, but does add a bit of backstory to the gameplay.
To reach the anteroom for this location from the open hatch in Tombs and Curses, move F L F L F2 L F2 R F L F. To reach the anteroom from the open bas-relief in Strange Inventions, move F L F4 L F2 R F R F. From other locations, refer to the corridor node map. At left is a stack of planks in which an Ixupi may be hiding. On the wall ahead is a jumbled-up picture that will need to be restored in order to open the door at right leading to the Fortune Teller's room.
After the Jigsaw Puzzle is solved, back out and turn right. Open the door and enter the Fortune Teller's room. Zoom in on the Fortunes Told machine and use the coin there to get your fortune, which is in the form of a riddle:
The fortune card is not accessible in your Flashback menu. Other cards produced by the fortune teller include:
Earth must be aligned
With Love and War.
Then from below
You'll discover more.
Jeopardy is a game for the fearless.A pot on the floor in this room contains Merrick Campbell's ghost.
When danger presents itself, knowledge is not always reliable.
Beware of sleep, only awake may you destroy your enemies.
Your bravery is matched only by your danger.
The elements of nature are not what they seem.
Your life may be short unless you change tactics.
Beware the hazards lurking around every corner.
You are currently embarking on a path of great risk.
To reach this room, climb the stairs from Tombs and Curses to the rolling balls puzzle. The starting positions randomize each time the puzzle is played. Rotate the pieces to produce paths for 3 balls:
Go down the stairs and enter the blue Peruvian tomb ahead. Turn right to see some colored fabrics in which an Ixupi may be lurking. Opposite this tomb is a Norse burial ship. Since a Viking burial is referenced in the Museum Brochure, the top color on the skull dial to the right should be set to blue.
On the other side of the room is a Hindu sarcophagus of a lion standing on two legs; click on its base to access a Chinese Checkers puzzle guarding a pot or lid. Opposite this sarcophagus is a coffin from Ghana of a lion standing on four legs. Underneath the lion is Merrick's notebook in which he's drawn a map of the museum grounds and describes how he and Beth let all the Ixupi escape. He didn't survive the encounters with them, as can be seen by opening the coffin.
On entering this room, immediately turn right to a light-green effigy from a Congo witch doctor, in which an Ixupi may be lurking. In the main part of the room is a shaman with some drums. Take his bone hammer and use it to play the drum sequence seen earlier in the clock tower video display:
RAM TA BO BA TA RAM BAIt's best to have the sound on for this puzzle as it may be difficult to see whether the drums have been hit. After you've completed the sequence and returned the hammer to the shaman, a nearby passage will open up leading to Gods and Religious Items.
On entering the room and facing a green snake, a wooden Tiki statue at right may be harboring an Ixupi. Approach the snake, then move R F2 R F2 to a statue of Thor, which you may revisit later. Move L F3 to a two-headed Celtic sculpture. Since this is referenced in the Museum Brochure, the top color on the skull dial behind the sculpture should be set to red.
Enter the brick structure at the other end of the room. Press the large blue button on the 8-string Sumerian lyre to play a 12-note game of Simon Says (with no time limit). This puzzle randomizes each time it's played, so no fixed solution is possible. Numbering the lyre strings may help in keeping track of the sequence. It also may help to leave the mouse cursor on the last string you plucked so that you can more easily identify the new one added afterwards, even though the cursor may change to its "busy" form. Your progress is shown by the lit blue buttons along the bottom of the lyre. Be careful to position the cursor point close to the string before plucking it. In this tiresome exercise, you'll need to click on the correct strings 75 times in order to complete the puzzle. Making even a single mistake (or accessing the game menu) resets the puzzle back to the beginning. Save your game after you complete this tedium.
After the puzzle is finished, you can pick up a lid or pot from inside the Sumerian bull at right. Go to the red door at the other end of the room. A placard at right identifies this as the Chuen Door, but Beth called it the Red Door in her address book. Access the puzzle panel to the left of the door. Press the red button at the bottom to exit and reset the puzzle. The starting layout of pieces is randomized. A piece outside of the placement area can first be rotated clockwise by clicking on it. It may be simpler to start by placing the two U-shaped pieces, the single long piece, the two pieces containing a 2 x 2 square, the two W-shaped pieces, the single plus-shaped piece, the three L-shaped pieces and the single T-shaped piece, all of which may be easier to recognize than the remainder. This represents 12 of the 28 total pieces to be placed:
The complete solution to the pentomino placements is: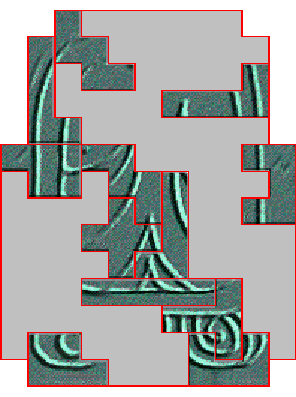
Note that it is impossible to open the red door from the Myths and Legends side until this puzzle is solved.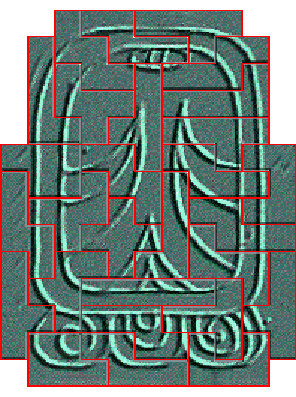
Optional Activity
If you've received the riddle in the Planetarium, move to the Thor statue, turn right and click on the tall blue carving against the wall. Zoom in on the rotated carving to read the third riddle in the game:
In hieroglyphics of Egypt
ancient, a secret is
concealed,
Contemplate page 17,
the solution is revealed.
Like the previous ones, this riddle is not accessible in your Flashback menu. A quick look in your Flashback menu shows that page 17 of Egyptian Hieroglyphs Explained has been torn out, so this is the end of the riddles (for now).
To reach this location from Gods and Religious Items, solve the red door puzzle there. This location consists of three connected rooms, colored red, blue and green. On entering the first (red) room reached from Gods and Religious Items, immediately turn left and check out the "Ancient Astrology" book and photos in Merrick's backpack. Across from the backpack is the music box in which you can access a pot or lid by turning its crank. This will work only if you've left Song B2 (Anansi the Spider) loaded on the jukebox in the clock Tower. To the left of the music box is a wax snake that may be hiding an Ixupi. Next to the snake is a Maori chest which discloses a pot or lid when opened.
The next room is mostly blue and has some wooden slats in the far corner in which an Ixupi may be lurking.
The third room is mostly green. After entering, move L F L and zoom in on a placard referring to a werewolf. Since this is referenced in the Museum Brochure, the top color on the skull dial next to the placard should be set to red.
Leaving the green room of Myths and Legends, turn left in the blue hallway and enter the bathroom at right. The red fabric here may be hiding an Ixupi. But underneath the cloth may also be a pot or lid, so you may need to visit this location later with a completed fabric pot+lid to first capture the Ixupi and identify what it's hiding.
Turning around, there's a toilet in the corner that may house another Ixupi.
The planetarium is up a staircase from the hallway connecting Myths and Legends and the bathroom. After entering the planetarium, bear to the left of the orrery and zoom in on a vertical blue ring on the wall. Click on its center to bring up an extraterrestrial pictograph puzzle, in which any two symbols can be swapped. Use the information from the "In Search of the Unexplained" book in the library to arrange the appropriate symbols:
This opens up the adjacent flying saucer, from which a pot or lid can be accessed. For another backstory item, press the button on the Polaroid camera on the floor between the flying saucer and the blue ring. On the opposite side of the room is a light shining down on a model of Stonehenge; the light fixture there may be hiding an Ixupi.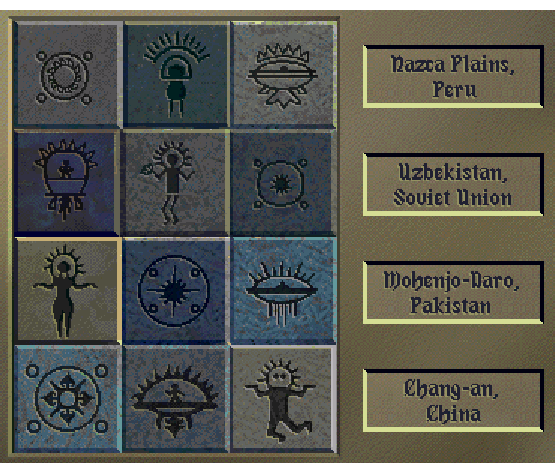
Optional Activity
If you've received the Fortune Teller's riddle, move to the doorway closest to the blue ring, turn around and face the orrery. Move forward toward the planets hanging from 3 curved arms (you won't be able to move forward there unless you've received the riddle). Identify Earth hanging from the middle arm, a blue Venus hanging from the left arm, and a small red/blue Mars hanging from the right arm. Align these three planets by dragging Venus behind Earth and Mars in front of it. The next riddle is then displayed beneath the sun globe:
Midst the storm, the Norse God executes
his thunderous deed. Near him a message,
its content you must heed.
This Planetarium riddle is also not accessible in your Flashback menu.
This room is connected to the Planetarium. Head for the bas-relief of a Mayan pyramid on the wall in the center of the room. Click on the center portion of the pyramid to disclose access to Corridor 3. From inside this corridor, you can return to the Strange Inventions room by moving one step toward the farther wall, then turning around and clicking twice on the wooden panel at right:
Back in the room, move R F3 R and click on the Alchemy Machine crate. Move F and click twice on the light-colored octagon to access the Alchemy Machine puzzle. Solving this puzzle provides access to a pot or lid.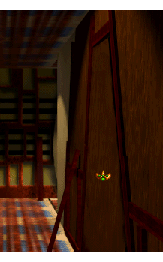
Entering this room from Strange Inventions, move F4 R F R and note the guillotine that will be used later. Move L F L and note the door leading to the Puzzle rooms as well as an electric chair in the cell at left, in which an Ixupi may be waiting. Move R F to a placard describing the gallows at right, in which a drop of 10 feet is described. Back out and move R F L F L F R F R F2 to the gallows control panel. Enter 120 (inches) on the dials for 10 feet, then pull the wooden lever. Descend into the hole and a pot or lid will be accessible there.
These rooms are accessible from a doorway in Man's Inhumanity to Man. At the end of the first L-shaped room is the Phoenician Puzzle controlling access to the next room through a panel in the wall. After the puzzle is solved, back out and the lower panel with question marks is now ajar. Go through this door into the next puzzle room. Click a few times only on the right-hand image Still life with skull, candle and book by Paul Cézanne, until a human-shaped depression can be seen in the checkerboard wall ahead. Click forward toward this shape as far as possible, then turn right to access the Pinball Machine puzzle. After that puzzle is solved, proceed through the now-open doorway in the checkerboard wall and access a pot or lid at the far end of the bridge.
There often is an extra sound heard over other sound effects and music when an Ixupi is occupying a location. For example, when the Water Ixupi is in the running fountain in the Main Entry Hall, a gurgling or bubbling sound is heard that isn't present at other times.
Once you've captured the Ixupi, its pot will appear permanently above your green status bar in the left-to-right position indicated in the Ixupi worksheet above.
Zoom in on it and click twice on the center red toggle to disclose Beth's body below. Be sure to read the note fragment she is holding in her skeletal hand. Per the third riddle in Gods and Religious Items, refer to page 17 in Egyptian Hieroglyphs Explained to complete the fourth and final riddle in the game: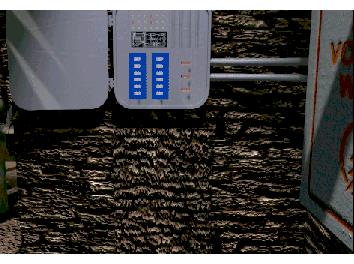
Return to Man's Inhumanity to Man. If you've become reasonably adept at solving elevator puzzles, a relatively short path is from Elevator C at the other end of Corridor 1 to Strange Inventions on Floor 3. Activate the guillotine near the spiky tunnel, and note the eye symbol shown on the blade. Continue through the adjacent Puzzle Rooms and across the bridge to a door with a six-skull dial. If all six skull dials in the rooms throughout the museum have been properly set, pressing the dial's central button here will light up all of its six skulls:
A NOBLE PUNISHMENT,
IT STILL CAUSES DREAD.
IF THIS BE YOUR CHOICE,
RELINQUISH YOUR HEAD.
If not, you'll need to return to other room(s) to verify the dials have been selected correctly. Spin the six-skull dial to open the door into a bare room lined with stone bricks. If you've successfully chopped off a head, the circular eye disk ahead will be colored red and you can click on it to take a slide back to the Main Entry Hall.
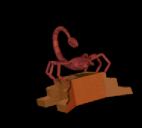
Pick up the Scorpion lid for the Electrical Ixupi pot from the secret hatch near the fountain. If you haven't already done so, go and retrieve the Electrical Ixupi pot from wherever you found it. Return to the generator room in the power plant and use the now-completed pot on the last remaining Ixupi. Watch the endgame sequence, which also will show up in the Flashback list. You can then optionally select museum Explore mode (without Ixupi) and can save further games, but note that all puzzles have been reset to an unsolved state.
The puzzle randomizes each time it is played, so there is no fixed solution. It can be reset to a different, perhaps easier, puzzle of the same size by clicking outside the control panel and then on it again. Some puzzles have one or more blocks on which no token can land, restricting the movement possibilities. On the other hand, if the movement count of an arrow button is 1 or if it does not evenly divide the grid size, then its repeated use on a token will eventually allow it to access all locations in a row or column (subject to blocks).
The general approach described here is to use row arrows to get one token in each column, then use column arrows to reach the final positions. It's usually easier to first position the tokens whose movement counts evenly divide the grid dimension.
4 x 4 puzzle. One of the configurations of the 4 x 4 puzzle has a single block in the upper-left corner. It has the following arrow movement counts:
It may take a dozen or more puzzle resets to obtain this configuration. To solve it, position one token in each of the two inner columns in one of the locations above indicated with asterisks. Position the other two tokens in the outer columns in any row. Then use the column arrows as many times as needed to move the tokens into their final positions along the rising diagonal.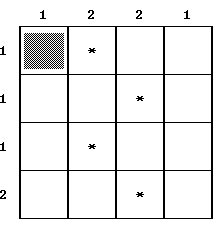
5 x 5 puzzle. One of the configurations of the 5 x 5 puzzle is without blocks. It may take a dozen or more puzzle resets to obtain that configuration. This particular puzzle may actually be one of the easiest to solve because there are no cells that cannot be reached with an arrow button (if it exists). For example, a row arrow can be used repeatedly to position a token into any desired column. Once each column contains a single token, the column arrows can be used as many times as needed to achieve the desired diagonal arrangement. It may be easier to first position the tokens in the diagonal locations corresponding to rows without arrows.
6 x 6 puzzle. One of the configurations of the 6 x 6 puzzle is without blocks. It has the following arrow counts:
It may take a dozen or more puzzle resets to obtain this configuration. If the token in one of the two middle columns isn't in an asterisk position, use a row arrow to vacate the column and another row arrow to move a token that is in the desired row into that column.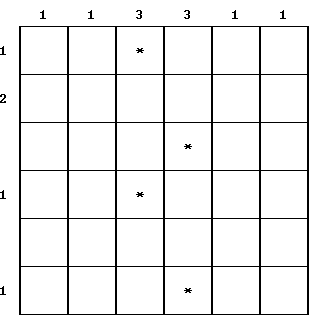
On an empty 3 x 4 grid, enter the number of clockwise rotations (0-3) needed for each piece. Since all rotations occur with pairs of pieces, the sum of all the numbers in your rotation grid should be even; if not, you've either made a mistake in counting the rotations needed, or the puzzle randomization is invalid and needs to be reset (which seems to be unlikely for this puzzle).
Next, you'll process all pairs of pieces that have the same number of rotations needed. The locations of these pairs can then be removed from your rotation grid. If there are any remaining rotations needed, they will be in one of patterns in the following table:
The finished puzzle is:
Remaining rotations needed Action to take One each of 1, 2 and 3 Select the pieces with 1 and 3 rotations needed,
and rotate them once. Process the resulting
pair needing two rotations.One each of 1 and 3 Select the piece needing 1 rotation and another
piece that has already been correctly rotated,
then rotate them once. Process the resulting
pair needing three rotations.A single 2 Select the piece needing rotation and another
piece that has already been correctly rotated,
then rotate them once. Update your grid with
their new positions. Continue with the
preceding case.
Using the notation:
a solution by Peel (1890) is: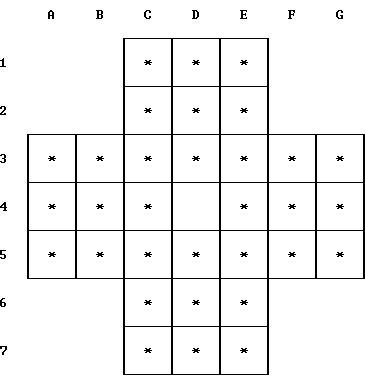
D6 D4 D3 D5 F4 D4 D6 F5 D5 E7 E5 E2 E4 E6 G3 E3 B3 D3 F3 C1 C3 C4 C2 C6 C4 A5 C5 D5 B5 A3 A5 C5 C7 E7 E5 E1 C1 C3 G5 G3 E3 C4 C6 E6 E4 E2 C2 C4 B4 D4
Begin by rotating all pieces so that a yellow octagon side is at the top and the other yellow side is in the right half or at the bottom of the octagon. Using compass notation, one yellow side is at N and the other is at NE, E, SE or S. Depending on the positions of the yellow and purple sides, first rotate the piece the indicated number of times and then move it into the central diamond at the indicated compass point:
The finished puzzle is:
Piece Yellow sides Purple sides Rotate: Move to: N, S NE, SW once W N, S NW, SW once NW N, NE E, NW (none) S N, NE W, NW 5 times SW N, NE W, SW 5 times NE N, SE E, S twice N N, SE NE, W 6 times E N, SE SW, W (Green at S) 6 times Center N, SE SW, W (Green at E) twice SE
This puzzle randomizes each time it's played, so no fixed solution is possible but you can use the built-in solver below. Instructions: In the game, zoom in on the puzzle on the wall and pull the big lever to get started.
Step 1: Click on the column of five symbols until they match the starting guess below. Symbols may be rotated forward in the sequence by pressing the right side, or backward by pressing the left. When the 5-symbol sequence has been entered, press the gray button underneath the column to display the score in yellow above the column.Continue this back-and-forth process until a solution is reached in the game and a score of 50 is displayed with no more guesses possible. To reset the puzzle, press the Restart button below and pull the big lever in the game.Step 2: Back on this webpage, select that score below using one of the buttons in the group at right.
Step 3: Press the "Find next guess" button below, and the best choice for the next guess will be displayed in the column at left. Back in the the game, repeat Step 1 using the new column of symbols.
It may be convenient to use a capital letter as shorthand notation for the seven possible symbols:
HandIf correctly used, the solver is guaranteed to find a solution in 8 or fewer guesses, with 5 or 6 being average.
Spider
sKull
Armadillo
Elephant
Bird
Lizard
For example, the right lever in the position second from the right moves its ball one position to the left, if it's open. Otherwise, the ball that is moved bounces off the occupant and the move is cancelled. The puzzle starts with position 5 open and the rest occupied. The objective is to have all balls on their matching backgrounds.
Source: 1 2 3 4 5 6 7 8 9 Target: 4 2 5 1 6 2 7 5 8 2 5 3 8 4 9 7 8 6
A solution in 18 moves is as follows:
Position Lever used Ball color 4 Right Blue 7 Right Pink 8 Right Purple 5 Left Blue 4 Right Pink 1 Left Green 2 Right Red 3 Right Plaid 6 Right Beige 9 Right Yellow 8 Left Blue 5 Left Pink 2 Left Plaid 3 Right Beige 6 Right Yellow 9 Right Blue 8 Left Pink 5 Left Plaid
Copyright © 1996,2023 Balmoral Software (http://www.balmoralsoftware.com). Portions copyright © 1995 Sierra On-Line, Inc. All rights reserved. Republication, redistribution or conversion is expressly prohibited without the prior written consent of Balmoral Software.


.jpg)